GoHighLevel Snapshots: Package a Proven Setup and Deploy It Cleanly
Capture a configured HighLevel sub-account, then deploy it into new or existing accounts without rebuilding workflows, forms, and pipelines manually.
Stop Rebuilding the Same System in Every Sub-Account
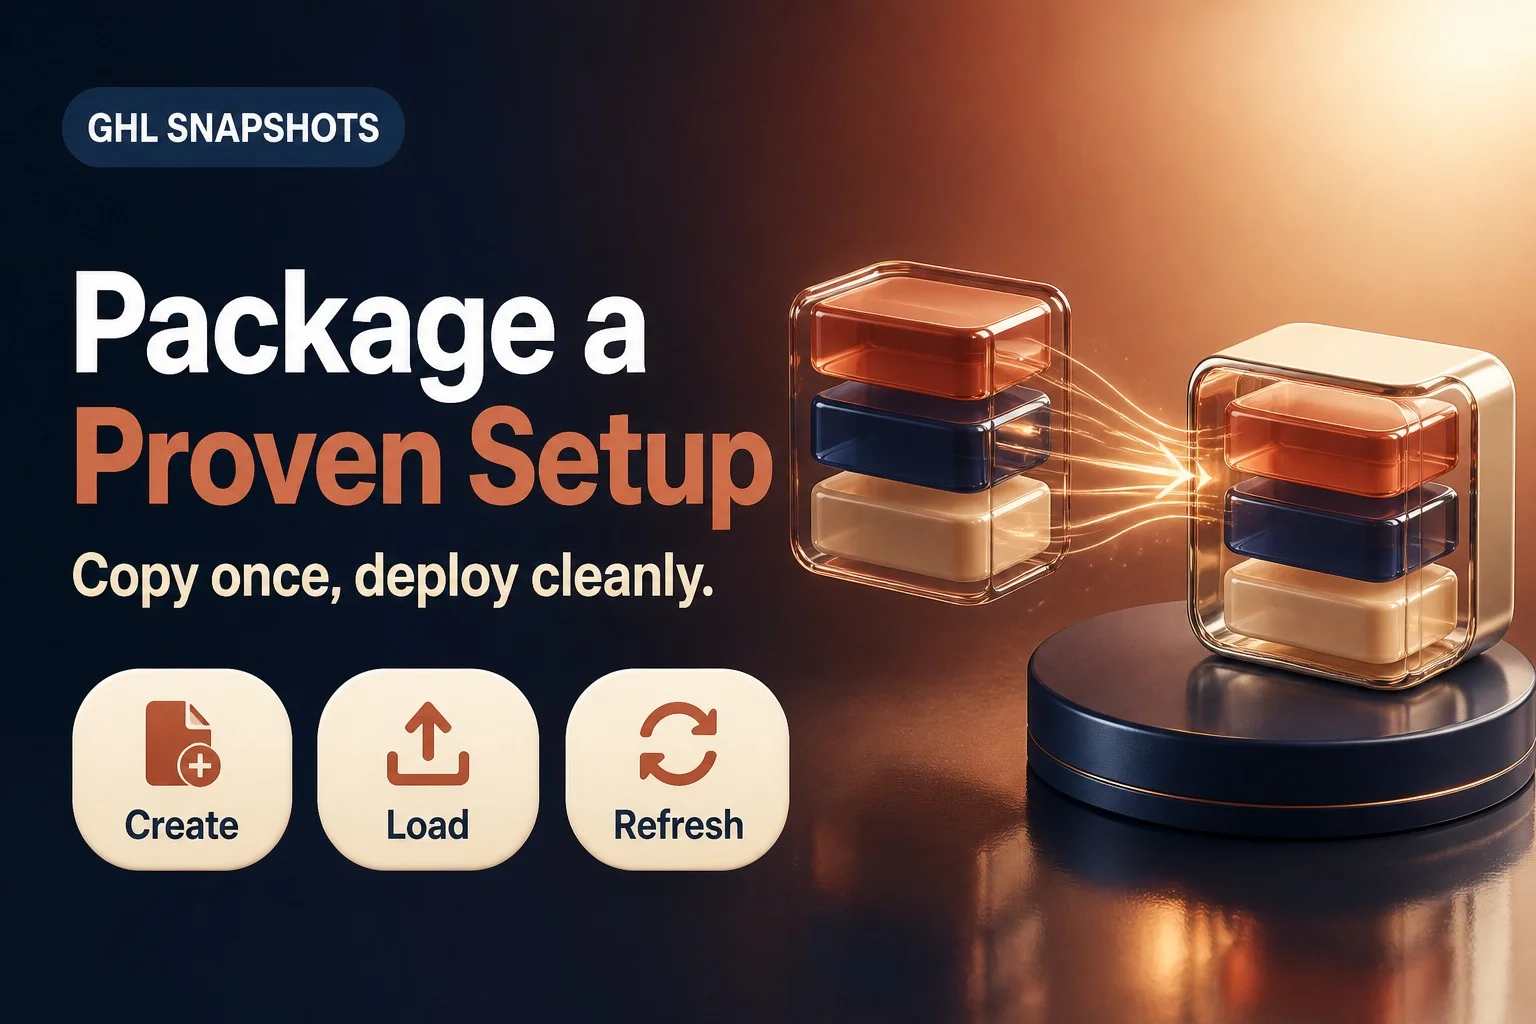
Rebuilding workflows, forms, calendars, pipelines, and dashboards in every new HighLevel sub-account is the expensive habit. You spend hours replicating the same intake form, the same nurture sequence, and the same pipeline stages because the alternative looks like a data migration project. It is not. GoHighLevel snapshots are reusable templates that capture selected configuration assets from a source sub-account so they can be copied into new or existing sub-accounts. You do not build a snapshot from scratch. You build a clean source account with the workflows, funnels, calendars, templates, and dashboards you want to reuse, then you capture it.
A snapshot copies configuration and selected reusable assets. It does not copy contacts, appointments, conversations, messages, reputation data, Stripe connections, or third-party integrations. It does not migrate live customer records or account history. The operator job is to choose the right action, review contents and dependencies, handle conflicts deliberately, and test the destination before live use. This post walks through how to package a proven setup and deploy it cleanly, including GoHighLevel Managed Agents and Custom Objects, so you can stop rebuilding and start scaling.
What a Snapshot Copies, and What It Leaves Behind
A snapshot can include AI and automation assets such as Agent Studio, which contains Managed Agents (HighLevel now calls them Managed Agents, formerly Super Agents), Brand Voice, Conversation AI, Voice AI Agents, Workflows, and Triggers. It can include calendars and services, including Calendar Groups, Calendar Service Add-Ons, Calendar Service Categories, Calendar Service Resources, Calendar Services, and Calendars. It can include CRM and data structure items such as Custom Fields (including Company custom fields), Custom Objects, Custom Values, Pipelines, Tags, Trigger Links, Smart Tags, Smart Lists, Company Smart Lists, and Custom Object Smart Lists. It can include marketing and content assets such as Blogs, Campaigns, Email Builder Templates, Forms, Funnels and Websites, Quizzes, Section Templates, Social Planner, Surveys, and Text and Email Templates. It can include reporting and dashboards, such as Custom Metrics, Custom Reports, and Dashboards. It can include memberships and learning assets such as Certificates, Membership Offers, Membership Products, and Webinars. It can include brand and design elements such as Brand Custom Color and Design Kit. It can include documents and knowledge such as Documents and Contracts, Folders, and Knowledge Bases. It can include Review Settings, WhatsApp Templates, and WordPress Site. It can include advertising campaign structures for Google, LinkedIn, and Meta.
The official HighLevel help overview lists what HighLevel snapshots can copy and notes that available items may vary based on assets in the source, enabled features, and categories selected during creation or loading.
Some copied assets require connected integrations, approvals, or post-load configuration before they can be used. WhatsApp Templates require WhatsApp integration and approval, and WhatsApp is not usable before Meta approval after import. Voice AI Agents require phone number assignment, and assigned phone numbers do not transfer. Some website or WordPress assets may require domain, plugin, or license updates after loading. Funnels and websites copied from a snapshot are drafts until you connect a custom domain and publish them. Company Smart Lists and Custom Object Smart Lists transfer the Smart List configurations, not the records displayed. Smart Lists evaluate the records available in the destination sub-account.
LinkedIn Ad Campaigns can be included, and HighLevel preserves the hierarchy Campaign Group, Campaign, and Ad. Lead Gen Forms are not included in snapshots. On load, imported LinkedIn campaigns are always created in Draft status. If LinkedIn is not connected in the destination, the import still completes and campaigns are created as Draft.
What Does Not Transfer
Snapshots do not include contacts, appointments, conversations, conversation history, messages, reputation data, live account activity, Stripe connections, integrations and third-party account connections, assigned phone numbers for Voice AI Agents, Lead Gen Forms for LinkedIn Ad Campaigns, private dashboards, WordPress third-party plugin or theme licenses that require re-authentication, WhatsApp usability before Meta approval after import, contact-to-contact associations, or assets protected by another creator's Assets Protected settings.
Snapshots copy reusable configuration, not live customer records or account history. If you need to move contacts or conversation history, you need a different tool. Snapshots are for packaging a proven system and deploying it into new or existing accounts.
Build the Source Account First
You do not build a snapshot from scratch. You build a clean source sub-account that contains the workflows, funnels, forms, calendars, templates, dashboards, and other assets you want to reuse, then you capture that sub-account. The cleaner the source, the cleaner the snapshot. Remove test workflows, draft funnels that never launched, and placeholder forms before you create the snapshot. Name assets clearly so they are recognizable when you review the snapshot contents later.
Picture a multi-location home services company that wants to deploy the same intake form, appointment calendar, and follow-up workflow into each new location. Build one sub-account with the intake form connected to the calendar, the calendar confirmation email, the follow-up workflow that applies tags and moves the contact through a pipeline, and the pipeline with the correct stages. Test it with a few contacts. Confirm the workflow sends the right email template, applies the right tag, and moves the contact to the right stage. Remove any test contacts, test appointments, or test conversations. That sub-account is now the source.
Official Create Steps
Go to Agency View, then Account Snapshots. Click the blue Create New Snapshot button in the top right. Enter a clear snapshot name that describes the use case, such as Home Services Intake System or Dental New Patient Onboarding. Select the source sub-account. Choose the assets to include. Use Select All or expand each category to select specific items. Company custom fields can be selected. Click Create to save the snapshot.
If any assets fail to load during creation, a Retry option reattempts fetching the incomplete categories without restarting the whole creation process. This is useful when there are a large number of assets or intermittent load delays.
After creation, you can inspect the snapshot contents by clicking the snapshot name. The Snapshot Asset Viewer shows a structured list of every asset the snapshot contains. The search field at the top right filters as you type. Use this to confirm that the intake form, the calendar, the workflow, and the pipeline all made it into the snapshot before you deploy it.
Capture Supporting Pieces with Asset Dependencies
A dependency is an asset that another asset references or needs to function correctly. A workflow may use an email template, reference a custom field, or apply a tag. If the workflow is in the snapshot but the email template or custom field is not, the workflow will load with a broken reference. Creating or refreshing a snapshot automatically includes available dependencies for supported selected assets. When loading the snapshot, turn on Auto include dependent assets in the Assets step to select those dependencies for the load. Use View dependencies to review them before continuing.
Automatic dependency detection initially covers Workflows and Email Templates. The asset selector identifies email builder templates under Email Builder Templates. Depending on what these assets reference, their dependencies can include Email Templates, Custom Fields, Custom Values, Tags, Pipelines and pipeline stages, Custom Objects, Trigger Links, and Brand Colors. An asset being included as a dependency is different from that asset type having its own automatic dependency detection. A tag may be included because a selected workflow requires it. That does not mean every snapshot asset category has automatic dependency detection.
Behavior by Action
When you create a snapshot, HighLevel detects and automatically includes available dependencies for supported assets you select. When you refresh a snapshot, HighLevel checks selected supported assets again and includes any newly required dependencies it can resolve. When you load a snapshot, turning on Auto include dependent assets automatically selects dependencies alongside the assets you choose to load. A dependency must be captured in the snapshot and included in the load to be transferred.
Controls and Indicators
The Auto include dependent assets toggle controls automatic dependency selection during load. Dependencies included shows the number of dependencies included in the current load selection. Dependencies not included warns that detected dependencies are not included in the current load selection. Gray checked boxes identify dependencies selected automatically while automatic inclusion is enabled. An information icon provides messages such as Required by Email Builder Templates or Required by Email Builder Templates, Workflow when you hover. An orange warning icon identifies a dependency that has not been selected for loading. View dependencies filters the asset list to show dependencies, and a Dependencies filter appears above the list. Show all assets returns from the dependency-filtered view to the full list. Auto included identifies an automatically included asset in Snapshot Version History details.
A dependency warning during asset selection does not necessarily mean the asset is missing from the snapshot. It can mean the asset is available but has not been selected for the current load. Review the warning, click View dependencies, and confirm whether the asset is present and selected. Unresolved dependencies are skipped. If HighLevel cannot find or resolve a referenced dependency, that item is left out without blocking remaining processing. The asset that requires it may still need correction after loading.
The official HighLevel help article on snapshot asset dependencies walks through how to include dependencies when loading, how to review auto-included assets in Version History, and the limitations of automatic coverage.

Two Deploy Paths: Create a New Sub-Account from a Snapshot vs Load into an Existing One
You can create a new sub-account and apply the snapshot during setup, or you can load selected snapshot assets into an existing sub-account. The first path is for launching a new client or location. The second path is for adding snapshot content to an account that is already active.
Create a New Sub-Account from a Snapshot
Creating a sub-account using a snapshot automatically loads the packaged assets into the new account. You do not need to manually load the snapshot after creation. You must have Agency Admin access. The snapshot must already exist in your account. The snapshot should include the key assets you want duplicated.
From your Agency Dashboard, click Account Snapshots. Locate the snapshot and click the blue Create New Account button beside the snapshot. Fill out the new sub-account information and click Add Sub-Account. The snapshot loads during creation. There is nothing to overwrite because the account is fresh. Only one snapshot can be selected when creating a sub-account. You can manually apply additional snapshots after the sub-account has been created. Once applied, a snapshot cannot be unloaded or deleted as a whole. You can delete or modify specific elements manually.
When you load a snapshot into a sub-account, all included funnels and websites are copied over as drafts. They will not be live until you connect a custom domain and publish them.
Load into an Existing Sub-Account
Loading imports prebuilt assets into an account that is already active. Existing client data is preserved unless a conflicting asset is intentionally overridden. From the Agency Dashboard, select Sub-Accounts. Locate the sub-account. Click the three-dot menu and select Manage Client. Click Actions in the upper-right corner and select Load Snapshot. If Load Snapshot is not available, confirm Snapshot access under User, Roles and Permissions from the Agency Dashboard.
In the Load Snapshot popup, open Pick a Snapshot, select the snapshot, and click Proceed. Use checkboxes to select assets, Select All, or expand categories with the plus icon to choose individual assets. Click Proceed. When dashboards are selected, click Set as default on the selected dashboard you want as the destination sub-account's default. Only one dashboard can be marked at a time. Clicking another selected dashboard changes the default. Clicking the currently marked dashboard again removes the selection. If no dashboard is marked, HighLevel uses the snapshot's existing default dashboard.
Importing webinars clones the webinar pages and automatically creates the corresponding webinar sessions. You can also start the load process from Account Snapshots via Load Updates to Sub-Account.
Conflict Handling on a Live Account
When you load a snapshot into an existing sub-account, HighLevel checks for assets that already exist in the destination with the same name or identifier. You can choose Proceed to check conflicts or Proceed without conflict check. Checking conflicts gives you the option to override or skip each conflicting asset. Override replaces the existing sub-account item with the snapshot version. Skip keeps the current version and excludes the conflicting snapshot item. After reviewing, click Proceed. Enter confirm when prompted, then click Proceed again. A success notification confirms the snapshot is being loaded. An email notification is sent once the information has been transferred.
Loading does not delete current data unless you choose to override a conflicting asset. If you accidentally override an asset, the override cannot be undone through the snapshot load. Review the conflict list carefully. You can load multiple snapshots into the same sub-account. If assets overlap, review conflict options carefully.
Imagine an existing client account that already has a workflow named New Lead Follow-Up and a pipeline named Sales Pipeline. You load a snapshot that also contains a workflow named New Lead Follow-Up and a pipeline named Sales Pipeline. The conflict screen lists both. You can override the existing workflow with the snapshot version, which replaces the current workflow entirely. You can skip the conflicting workflow, which keeps the current version and excludes the snapshot workflow. You can override the pipeline and skip the workflow. You can skip both and load only the other snapshot assets that do not conflict. The choice is deliberate, and there is no undo through the snapshot load.
Share, Import, and Protect
Sharing generates access. Importing adds the snapshot to the receiving agency library. Loading applies selected assets. Share from My Snapshots via the three-dot menu, then Share Snapshot. Official link types include Permanent, One-Time, Email, Agency-Restricted, Sub-Account Restricted, and Marketplace. A Permanent Link is reusable by anyone with the active URL. A One-Time Link is valid until the permitted import is completed. An Email Link is intended for a single email recipient and is delivered by email. An Agency-Restricted Link is limited to agencies whose relationship numbers are specified. A Sub-Account Restricted Link is limited to the designated sub-account. A Marketplace Share Link is for eligible buyers through the HighLevel App Marketplace listing, and Assets Protection is automatically applied to help prevent protected assets from being repackaged or resold.
If the source changed after creation, refresh the snapshot first so the share contains the intended current assets. Choose a link type, optionally configure Assets Protection, review protected assets when applicable, click Get Link, copy and send the link.
Assets Protection
Turn on Assets Protected if you want applicable assets to remain protected after the recipient imports them. Recipients can use protected assets within their agency but cannot redistribute them externally. Mixed snapshots can still be shared. Only protected assets are held back. HighLevel identifies protected assets during external sharing. You do not need to remove them manually. Importing a valid protected snapshot is allowed. Loading protected assets into a sub-account in the receiving agency is allowed. Reuse across other sub-accounts in the same agency is allowed. Creating or refreshing another snapshot using protected assets is allowed within the agency. Sharing or reselling protected assets to another agency is restricted. If a mixed snapshot is shared externally, eligible non-protected assets can continue and protected assets are excluded. Protection stays attached. Loading or copying inside the agency does not remove protection.
Import from a Share Link or Email
You can import from a snapshot share link or an email invitation. Sign in to the HighLevel agency where you want to import the snapshot. Open the snapshot share link. Review the snapshot import pop-up. Enter a custom snapshot name if you want to rename it before importing. Click Import Now. Watch for the snapshot to appear in your imported snapshots list. Wait until the greyed-out processing state clears and the snapshot becomes available. Do not start another import because it is greyed out. When processing finishes, it becomes active. Wait until it becomes active before loading.
Import Errors
Expired Snapshot Share Link means you should ask the owner to generate a new share link. One-Time Link Already Used means you should ask the sender to generate another one-time link. Restricted Link may be limited to a particular agency or sub-account. Confirm you are signed in to the intended agency and the sender used the correct restriction. Unavailable Snapshot means the source snapshot may no longer exist or be available. Ask the sender to verify. General Import Failure means you should retry after confirming the share is still valid. Contact support if it continues. A shield or Assets Protected indicator is not an error. The snapshot contains protected assets, and protection remains attached.
External Agencies and Updates
External agencies do not receive snapshot updates automatically. Refresh, generate an updated share, and have the external agency import the updated snapshot. Inside your own agency, refresh first, then use Push Updates for eligible linked sub-accounts and choose which refreshed assets to send.
Refresh, Version History, Push Updates, and Linked Assets
Source changes do not update a snapshot automatically. Go to Agency View, then Account Snapshots. Click the Refresh icon next to the snapshot. Select which new or modified assets you want to include. Click Refresh. After you click Refresh, HighLevel loads selected assets from the source. A progress indicator shows how many assets have been loaded. If some assets fail, refresh continues for the others. Failed assets are marked as failed. You can retry loading only the failed assets instead of restarting the entire refresh.
Version History
A new version is created after a successful snapshot refresh. Opening or editing without refreshing does not create a version. A failed refresh does not create a version. Version History shows a chronological list with creation date and time and Added, Removed, and Synced counts relative to the previous version. Opening a version shows assets grouped by type and which were Added, Removed, or Synced. Synced means the asset was included in both the previous and current version without being added or removed. Version references appear in My Snapshots, Imported Snapshots, and Shared Snapshots. There is no built-in revert or restore action. Version Management is informational and does not automatically update client sub-accounts.
Push Updates
After you refresh a snapshot, Push Updates lets you select previously imported sub-accounts inside your own agency and choose which assets to push without reloading the entire snapshot. Select which sub-accounts that previously imported this snapshot should receive the update. Choose the assets to push, for example only workflows or specific forms. Manually sync updates into those sub-accounts without reloading the entire snapshot. Updates only push to sub-accounts inside your own agency. External agencies must re-import using a new link. Pushed updates are selective, not destructive. Existing data stays safe.
Workflow Contact Cleanup After Snapshot Refresh
If a snapshot refresh removes steps inside workflows that were created from the snapshot, for example deleting a wait step, HighLevel automatically removes any contacts that were waiting on the deleted step so they do not get stuck. A one-time heads-up appears the next time you open an affected workflow, shown only when it applies. In Execution Logs, the workflow records an entry labeled Removed by - Snapshot Refresh with more details in the side panel. This applies only to workflows created from snapshots when a refresh deletes steps.
Manage Linked Assets
Snapshot Asset Linking lets you manually control which assets are included when you push a snapshot. Go to Account Snapshots, then My Snapshots, then More Actions (three dots), then Edit Snapshot. Enabled assets will be pushed. Disabled assets will not be included. Click Save. The UI includes filter and search tools. Unlinking an asset does not delete it from existing sub-accounts. It only affects future snapshot pushes. This feature is currently available for user-created snapshots. System snapshots are not editable.

Managed Agents and Custom Objects Inside Snapshots
Managed Agents and Custom Objects can both travel inside a snapshot, and both require deliberate selection and post-load review.
Managed Agents
Managed Agents are available under the Agent Studio asset category during snapshot creation, refresh, and loading workflows. A snapshot can preserve agent flow structure, node configurations, prompts and instructions, triggers, skills and capabilities, connected Knowledge Bases when those Knowledge Base assets are selected, and agent version state such as Draft, Staging, or Production. Review the agent's dependencies before creating the snapshot. If the Managed Agent relies on a Knowledge Base, workflow, Custom Value, or another selectable asset, include that supporting asset in the snapshot. Knowledge Bases are not automatically included unless selected. If a connected Knowledge Base is not selected, the agent may load without its reference material.
You can select individual Managed Agents independently or package them with other snapshot assets. You can include more than one Managed Agent. Open the source sub-account and confirm the Managed Agent contains the configuration you want to reuse. Switch to Agency View, then Account Snapshots, then Create New Snapshot. Enter a descriptive name and select the source sub-account. Expand Agent Studio and select the Managed Agent or Managed Agents. Select any supporting assets required, such as applicable Knowledge Bases, workflows, or Custom Values. Review selected assets and click Create.
To load, go to Agency View, then Sub-Accounts, then the three-dot menu, then Manage Client, then Actions, then Load Snapshot. Choose the snapshot. At the Assets step, expand Agent Studio and select the Managed Agents. Click Proceed to check conflicts, recommended when the destination may already contain a related agent or earlier version, or Proceed without conflict check. When using conflict checking, expand the destination sub-account and review the available selections, then Proceed and wait for loading to finish.
Verify After Load
Open the destination sub-account. Navigate to AI Agents, then Agent Studio. Open the Managed Agents tab. Confirm the transferred agent appears. Review name and description, triggers, skills, capabilities, Knowledge Base configuration, instructions, and required integrations or account-specific connections. Test the agent in the destination account. Publish or activate it when it is ready for use. A transferred Managed Agent will not necessarily run immediately. Account-specific integrations, permissions, credentials, or other connections may need to be configured in the destination.
Refresh After Updating a Managed Agent
Make changes in the source, return to Agency View, then Account Snapshots, click Refresh icon, expand Agent Studio, select the updated Managed Agent and any new or modified supporting assets, click Refresh, wait for fetching to finish, then use load or push update. Updates pushed from an agency snapshot are available to linked sub-accounts within that agency. External recipients generally need an updated shared snapshot.
Custom Objects
A snapshot can include Custom Objects, custom fields associated with those objects, and supported associations between CRM objects. Associations are included automatically when both objects in the relationship are selected. Contact-to-contact associations are not supported. Associations are included by default and cannot be modified or deselected during snapshot creation. Associations between custom objects and other objects, including contacts, will be automatically created or updated. Custom Object records are not snapshot assets. Snapshots copy reusable configuration, not live customer records. Custom Objects can only be copied between sub-accounts. Direct export of custom objects is not supported.
Official Documented Limit
All current HighLevel plans support up to 10 Custom Objects per location. Snapshot imports remain subject to the Custom Object limit in the destination account. The official FAQ states you do not need the Pro plan to use Custom Objects. Starter, Unlimited, and Pro plans currently support up to 10 Custom Objects per location. A snapshot can contain a maximum of 10 custom objects per sub-account. If importing the snapshot would exceed this limit, no custom objects will be created in the target sub-account.
Company Smart Lists and Custom Object Smart Lists
Company Smart Lists and Custom Object Smart Lists can be included. Build and test the Smart List in the source, then select those lists and include the underlying Custom Object and fields used by those lists. Snapshots copy the Smart List configuration, not the records displayed. The Smart List evaluates records available in the destination. You can load more than one snapshot into the same sub-account. Review conflicts when assets overlap.
Granular Permissions
Admins can assign precise snapshot permissions. Official permissions include View Snapshots, Create Snapshots, Edit Snapshots, Share or Import Snapshots, Push Snapshots, Refresh Snapshots, and Delete Snapshots. Navigate to Settings, click Team, select the user, click Edit User Option, go to the Snapshot Scopes section, enable or disable specific snapshot permissions, and click Save Changes. Official best practices include regularly reviewing permissions, restricting sensitive actions like Delete Snapshots and Push Snapshots to trusted team members, and educating team members on their permissions.
Users must have Create Snapshots permission to create and Share or Import Snapshots permission to load or share. Only Agency Admin can create a new sub-account using a snapshot. If Load Snapshot is unavailable, verify snapshot access under User, Roles and Permissions from the Agency Dashboard.
As an operator practice, restrict Delete and Push to trusted team members who understand that Delete removes the snapshot from the agency library and Push sends refreshed assets to linked sub-accounts. Give View and Create to team members who need to inspect snapshots or capture new ones. Give Share or Import to team members who need to generate share links or import snapshots from external agencies. Give Refresh to team members who need to update snapshots after source changes. Do not give every teammate Push and Delete permissions.
Post-Load QA Checklist Before Anyone Uses the System with Live Contacts
A successful load is not a substitute for testing. Review the destination configuration before using it with live contacts. Reconnect Stripe and other integrations. Stripe connections and integrations do not transfer. Assign Voice AI phone numbers. Voice AI Agents require phone number assignment, and assigned phone numbers do not transfer. Complete WhatsApp integration and wait for Meta approval before relying on those templates. WhatsApp Templates require WhatsApp integration and approval, and WhatsApp is not usable before Meta approval after import. Connect domains and publish draft funnels or websites. Funnels and websites copied from a snapshot are drafts until you connect a custom domain and publish them. Review WordPress plugin or theme licenses. WordPress third-party plugin or theme licenses that require re-authentication do not transfer.
Inspect workflow Send Email actions and send a test email. For workflow emails, review Send Email actions, confirm template connections and content, and send a test email before activating. Open transferred Managed Agents and test them. Review and test a transferred Managed Agent, then publish or activate when ready. Knowledge Base content will be missing if the KB was not selected. Verify Custom Objects, fields, associations, and Smart Lists against destination records. Smart Lists evaluate destination records, not source records. Confirm the default dashboard if dashboards were loaded. Confirm LinkedIn campaigns arrived as Draft. LinkedIn campaigns arrive in Draft and Lead Gen Forms are not imported. Walk one complete path, such as form or calendar to workflow to pipeline or notification.
Inspect calendars, forms, pipelines, tags, custom fields, and custom values that workflows or forms depend on. Reconnect payment processors and other integrations. Assign or purchase destination phone numbers. Confirm dashboard default if dashboards were loaded. Confirm user permissions for who may refresh, push, share, or delete. Test one complete path in the destination before going live. Do not treat greyed-out imported snapshots as ready to load. A successful load is not a substitute for testing.
Common Mistakes
Treating a Snapshot as a Contact or Conversation Migration
Snapshots copy reusable configuration, not live customer records or account history. Contacts, appointments, conversations, messages, reputation data, and live account activity do not transfer. If you need to move contacts or conversation history, you need a different tool. Snapshots are for packaging a proven system and deploying it into new or existing accounts.
Building the Snapshot Without First Cleaning the Source Account
The cleaner the source, the cleaner the snapshot. Remove test workflows, draft funnels that never launched, and placeholder forms before you create the snapshot. Name assets clearly so they are recognizable when you review the snapshot contents later. A snapshot that contains many workflows, some of which are labeled Test or Draft, is harder to review and harder to load selectively.
Loading Workflows Without Auto Include Dependent Assets or Without Selecting a Managed Agent's Knowledge Base
A workflow may use an email template, reference a custom field, or apply a tag. If the workflow is in the snapshot but the email template or custom field is not, the workflow will load with a broken reference. Turn on Auto include dependent assets in the Assets step to select those dependencies for the load. Use View dependencies to review them before continuing. If the Managed Agent relies on a Knowledge Base, include that supporting asset in the snapshot. Knowledge Bases are not automatically included unless selected. If a connected Knowledge Base is not selected, the agent may load without its reference material.
Skipping Conflict Review on a Live Account or Overriding Casually
When you load a snapshot into an existing sub-account, HighLevel checks for assets that already exist in the destination with the same name or identifier. You can choose Proceed to check conflicts or Proceed without conflict check. Checking conflicts gives you the option to override or skip each conflicting asset. Override replaces the existing sub-account item with the snapshot version. If you accidentally override an asset, the override cannot be undone through the snapshot load. Review the conflict list carefully.
Expecting Source Edits to Update Destinations Automatically Without Refresh and Push
Source changes do not update a snapshot automatically. Refresh the snapshot after you change the source. After you refresh, Push Updates lets you select previously imported sub-accounts inside your own agency and choose which assets to push without reloading the entire snapshot. External agencies do not receive snapshot updates automatically. Refresh, generate an updated share, and have the external agency import the updated snapshot.
Treating a Finished Load as Production-Ready
A successful load is not a substitute for testing. Review the destination configuration before using it with live contacts. Reconnect Stripe and other integrations. Assign Voice AI phone numbers. Complete WhatsApp integration and wait for Meta approval before relying on those templates. Connect domains and publish draft funnels or websites. Review WordPress plugin or theme licenses. Inspect workflow Send Email actions and send a test email. Open transferred Managed Agents and test them. Verify Custom Objects, fields, associations, and Smart Lists against destination records. Confirm the default dashboard if dashboards were loaded. Confirm LinkedIn campaigns arrived as Draft. Walk one complete path.
Ignoring Custom Object Capacity So No Custom Objects Are Created
All current HighLevel plans support up to 10 Custom Objects per location. A snapshot can contain a maximum of 10 custom objects per sub-account. If importing the snapshot would exceed this limit, no custom objects will be created in the target sub-account. Before you load a snapshot that contains Custom Objects, confirm the destination sub-account has enough available Custom Object capacity. If the destination is already near the per-location Custom Object limit and the snapshot would push it over, no custom objects will be created.
Giving Every Teammate Push and Delete Permissions
Restrict Delete and Push to trusted team members who understand that Delete removes the snapshot from the agency library and Push sends refreshed assets to linked sub-accounts. Give View and Create to team members who need to inspect snapshots or capture new ones. Give Share or Import to team members who need to generate share links or import snapshots from external agencies. Give Refresh to team members who need to update snapshots after source changes. Do not give every teammate Push and Delete permissions.
A 14-Day Practice Plan
Days 1 to 3: Choose or clean a source sub-account and write down what should and should not be packaged. Remove test workflows, draft funnels that never launched, and placeholder forms. Name assets clearly. Confirm the intake form is connected to the calendar, the calendar confirmation email is correct, the follow-up workflow applies tags and moves the contact through a pipeline, and the pipeline has the correct stages. Test it with a few contacts. Remove any test contacts, test appointments, or test conversations.
Days 4 to 6: Create the snapshot. Go to Agency View, then Account Snapshots. Click Create New Snapshot. Enter a clear snapshot name that describes the use case. Select the source sub-account. Use Select All or expand each category to select specific items. Click Create. Inspect it in the asset viewer by clicking the snapshot name. Review auto-included dependencies in Version History. Open Version History, select the version, and look for assets marked Auto included.
Days 7 to 9: Deploy to a new test sub-account or load selected assets into an existing non-critical account with conflict checking. From your Agency Dashboard, click Account Snapshots. Locate the snapshot and click the blue Create New Account button beside the snapshot. Fill out the new sub-account information and click Add Sub-Account. Or, from the Agency Dashboard, select Sub-Accounts, locate the sub-account, click the three-dot menu, select Manage Client, click Actions, select Load Snapshot, choose the snapshot, select assets, turn on Auto include dependent assets, click Proceed to check conflicts, review, enter confirm, click Proceed, and wait for the email notification. Then run the QA checklist. Reconnect Stripe and other integrations. Assign Voice AI phone numbers. Complete WhatsApp integration. Connect domains and publish draft funnels or websites. Inspect workflow Send Email actions and send a test email. Open transferred Managed Agents and test them. Verify Custom Objects, fields, associations, and Smart Lists. Confirm the default dashboard. Confirm LinkedIn campaigns arrived as Draft. Walk one complete path.
Days 10 to 12: Make one source change. Edit a workflow in the source sub-account, add a new step, or change an email template. Refresh the snapshot. Go to Agency View, then Account Snapshots. Click the Refresh icon next to the snapshot. Select which new or modified assets you want to include. Click Refresh. Read the Added, Removed, and Synced summary in Version History. Push selected updates to a linked account inside the agency. Click Push Updates. Select which sub-accounts that previously imported this snapshot should receive the update. Choose the assets to push. Click Proceed. Or practice unlinking an asset you do not want pushed. Go to Account Snapshots, then My Snapshots, then More Actions (three dots), then Edit Snapshot. Disable the asset. Click Save.
Days 13 to 14: Review Snapshot Scopes for the team. Navigate to Settings, click Team, select the user, click Edit User Option, go to the Snapshot Scopes section, enable or disable specific snapshot permissions, and click Save Changes. If you share externally, generate the right link type after a refresh. Go to Agency View, then Account Snapshots, then My Snapshots, then three-dot menu, then Share Snapshot. Choose a link type. Optionally configure Assets Protection. Review protected assets when applicable. Click Get Link. Copy and send the link.
How SumoGrowth Labs Helps
SumoGrowth Labs is an AI implementation and consulting agency. We design a clean source account, choose what to package, check dependencies and conflicts, deploy Managed Agents and Custom Objects with the rest of the system, and run post-load QA so the destination is actually usable. We do not sell software. We implement and set things up. If you need a proven setup packaged and deployed cleanly, we can help.
by Darius Gaynor