GoHighLevel Funnels & Landing Pages: Capture Leads Without Losing Attribution
A practical operator guide to building HighLevel funnels that preserve attribution, trigger workflows, and connect leads to pipelines without breaking tracking.
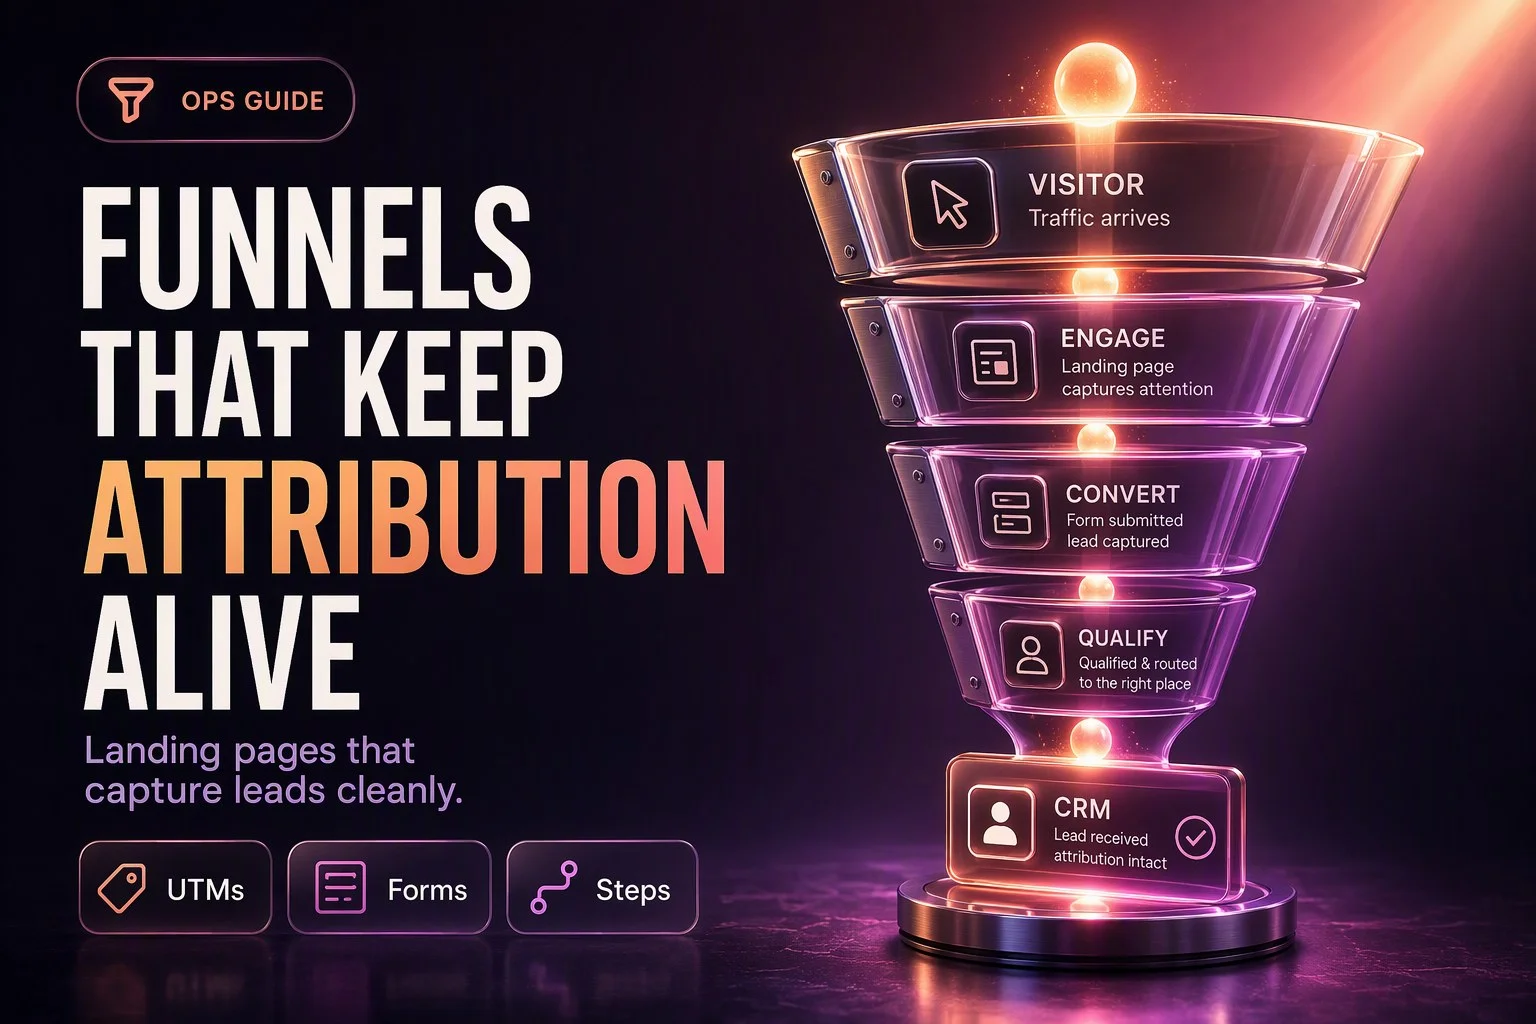
You can build the most beautiful landing page in HighLevel, drive thousands of dollars in paid traffic to it, and still lose money. Not because the offer is weak or the copy is bad, but because attribution breaks, leads never hit the right pipeline, and your follow-up workflows never fire. The page converts, but the system does not know where the lead came from, which campaign paid for it, or what to do next. You end up with orphaned contacts, no opportunity records, and no way to calculate cost per acquisition. Pretty pages do not pay the bills. Attribution-safe funnels that wire leads into pipelines and workflows do.
This guide walks you through building HighLevel funnels and landing pages that capture leads without losing attribution. You will learn how funnel steps work, how to add and edit forms inside the Funnel Builder, how to use UTM parameters correctly so HighLevel records the source, how to trigger workflows from form submissions and page views, and how to connect funnel leads to pipelines and calendars. You will also see the most common attribution and funnel failure modes operators hit when they prioritize design over tracking hygiene, and a checklist to test before you spend ad budget.

What a HighLevel Funnel Is and Why Step-Based Thinking Matters
A HighLevel funnel is a series of connected pages, called steps, that guide a visitor through a conversion path. Each step is a separate page with its own URL path under your domain. The classic example from the official HighLevel documentation is a three-step funnel: a landing page that offers a download or lead magnet in exchange for contact information, a booking page with an embedded calendar, and a thank-you page that confirms the appointment and provides next steps.
This is different from a single website page. A website in HighLevel can have multiple pages, navigation, and a blog, but it is designed for browsing. A funnel is designed for a single conversion goal per step. You control the flow. The visitor lands on step one, takes an action, and moves to step two. No global navigation. No distractions. One primary action per step.
Step-based thinking forces you to map the conversion path before you design anything. What is the visitor supposed to do on the landing page? Submit a form. What happens after they submit? They see a thank-you page or move to a booking step. What do you need to track? The form submission, the source of the traffic, and whether they booked. When you think in steps, you can wire each step to a workflow trigger, tag the lead by funnel and campaign, create an opportunity in a pipeline, and assign the lead to a user. When you think in pretty pages without steps, you end up with a single long-scroll page that looks great but has no clear handoff to your CRM automation.
Funnels also let you test and iterate one step at a time. If your landing page converts but your booking page does not, you know where to focus. If your thank-you page has a high bounce rate, you can add a clearer call to action or embed a calendar. Step-based funnels give you visibility into each stage of the conversion path, which is critical when you are spending money on paid traffic.
Creating a Funnel in HighLevel: Sites, Funnels, and Your Starting Options
To create a funnel in HighLevel, navigate to Sites in the left sidebar, then click the Funnels tab. Click the New Funnel button. You will see three starting options: From Blank, From Templates, and Funnel AI or Build with AI paths.
From Blank gives you an empty funnel with no steps. You add each step manually and design each page from scratch in the Funnel Page Builder. This is the cleanest option if you have a specific funnel structure in mind and you do not want to strip out template elements.
From Templates opens the HighLevel funnel template library. You can filter by industry, funnel type, and goal. Templates include pre-built steps, placeholder copy, and form elements. You can preview a template before you select it. Once you choose a template, HighLevel creates a new funnel with all the steps and pages copied into your subaccount. You can then edit the copy, swap images, and adjust the form fields. Templates are useful if you want a head start on design and structure, but you will still need to connect your domain, update the form to match your custom fields, and wire the funnel to your workflows.
Funnel AI or Build with AI paths are optional accelerators. The Assist path uses structured inputs like niche, page goal, audience, and offer. The Build path uses a detailed prompt. Both generate funnel steps and page content based on your inputs. The official documentation notes that Funnel AI generations may incur a small fee after your free generations are used, so check your plan limits before you generate multiple funnels. AI-generated funnels still require the same post-creation work: domain connection, form field mapping, UTM setup, and workflow triggers. AI can save time on layout and copy, but it cannot wire your funnel to your attribution and automation stack.
Most operators start with From Blank or From Templates and build the funnel step by step. This gives you full control over the structure and makes it easier to troubleshoot attribution and workflow issues later.
Designing Funnel Steps for Capture, Not Vanity
The biggest mistake operators make is designing funnel steps for visual impact instead of conversion and tracking. A step that looks amazing but does not capture the lead on the correct page, or does not fire a workflow, or loses attribution, is a step that costs you money.
Here is the rule: one primary action per step. If the step is a landing page, the primary action is to submit the form. If the step is a booking page, the primary action is to book an appointment. If the step is a thank-you page, the primary action is to confirm next steps or click a secondary call to action. Do not ask the visitor to do three things on one page. Do not bury the form below the fold. Do not add a navigation menu that lets them wander off to your website. One step, one goal.
The second rule is even more important for paid traffic: keep the form on the paid Final URL. When you run a Google or Facebook ad, the Final URL is the landing page the visitor sees after they click. HighLevel records attribution from UTM parameters in the URL, but only if the visitor submits a form or books an appointment on that same page in the same session. If they land on your landing page, then click a button to go to a second page where the form lives, attribution from the original UTM parameters is not added to the contact record. The system sees the form submission on the second page, not the landing page with the UTMs. You lose the source data.
The workaround is simple: put the form on the landing page. You can place it as a section at the top or middle of the page, or you can trigger it as a popup after a few seconds or on exit intent. Either way, the form submission happens on the same page the visitor landed on, and HighLevel records the UTM parameters as First Attribution. If you want a multi-step experience, use a multi-step form on the same page, or use a funnel step that includes the form and then redirects to the next step after submission. Do not send the visitor to a second page to fill out the form unless you are willing to lose attribution from the ad click.
This is not a design preference. This is how HighLevel attribution source tracking works. The system captures attribution when a form is submitted, a calendar booking is made, a chat widget collects contact info, or an order form is completed. If the submission happens on a different page than the one with the UTM parameters, those parameters are not recorded. Operators who ignore this rule spend thousands on ads and then wonder why their attribution reports show Direct or CRM UI as the source instead of Paid Search or Paid Social.
Adding and Editing Forms Inside the Funnel Builder
Once you have created your funnel and added a step, you need to add a form to capture leads. In the Funnel Page Builder, open the Elements panel on the left and drag the Form element onto the page. A Form Picker modal will appear. You can select an existing form from the list, or you can create a new form by clicking the option to build one under Sites, Forms.
When you select or create a form, HighLevel opens a pop-up Form Builder inside the Funnel Builder. This is a streamlined version of the full form editor. You can add fields, adjust styles, and choose a theme without leaving the funnel. The Quick Add section lets you add common fields like Full Name, Email, and Phone with one click. You can also add custom fields and object fields if you have built them in your subaccount. Once you finish editing the form, click Save. The changes apply immediately, and you return to the Funnel Page Builder with the form embedded on the page.
This inline editing flow is convenient, but it also means you need to be careful about field mapping and validation. If you add a custom field to the form, make sure it exists in your contact record and that the field type matches. If you use a dropdown or radio button field, make sure the options match the values in your custom field. If you use a phone field, make sure it is set to validate phone numbers so you do not collect garbage data. Clean GoHighLevel forms and surveys start with clean field mapping and validation rules, and that work happens in the Form Builder before you publish the funnel.
After you save the form, you can adjust its position, width, and spacing on the page using the Funnel Page Builder controls. You can also style the form container, button colors, and field borders using the Styles panel. The form itself inherits the theme you selected in the Form Builder, but you can override specific styles in the page builder if needed.
One common operator mistake is to add a form to a funnel step, publish the funnel, and never test the form submission. Always submit a test lead with real data and check that the contact is created in HighLevel, that the form fields map to the correct contact fields, and that any workflows or automations fire as expected. If the form does not create a contact or the workflow does not trigger, you have a configuration issue that will cost you leads when you turn on paid traffic.

Tracking and UTMs: HighLevel Templates, Case Sensitivity, and the Final URL Rule
Attribution in HighLevel shows which channels or sources a contact came from. First Attribution is the first recorded interaction. Latest Attribution is the most recent recorded interaction. Latest Attribution changes every time a contact submits a form or books an appointment with new UTM parameters. First Attribution does not change after it is set. Both are visible on the contact record in the Activity area at the bottom right.
HighLevel records attribution when certain events happen in the same session: form or survey submission, calendar booking submission, chat widget after submitting contact info, or order form submission. External Tracking can capture attribution for supported third-party DOM forms, but most operators use HighLevel forms and booking pages, so the standard events are what matter.
The system classifies sources using an ordered rule set. Paid Search classification expects HighLevel Google UTM template patterns. These patterns are case-sensitive. For example, utm_source=adwords plus related ValueTrack fields, or click IDs such as gclid, wbraid, gbraid, or msclkid. If you use utm_source=AdWords with a capital A and W, HighLevel may not classify the source as Paid Search. If you use utm_source=google instead of utm_source=adwords, the classification may fall through to a different rule.
Paid Social classification expects HighLevel Facebook and Instagram template patterns. The current standard is utm_source=fb_ad. The older utm_source=facebook is deprecated. Other paid social source values documented in the official help include linkedin_ad, twitter_ad, and reddit_ad. Again, these are case-sensitive. If you use utm_source=FB_Ad or utm_source=Facebook_Ad, the system may not classify the source correctly.
After paid search and paid social checks, the system looks for organic social referrers, organic search referrers, referral sources, direct traffic, and other sources. If none of the rules match, the source may be recorded as CRM UI or third-party, depending on how the contact was created.
The most critical rule for operators running paid traffic is this: for UTMs to record, the visitor must submit a form or book an appointment on the Final URL they landed on from the ad. If they land on your landing page with UTM parameters in the URL, then click a button to go to a second page where the form lives, attribution from those UTM parameters is not added to the contact record. The system does not carry UTM parameters across page navigations in the same way a session cookie might. The attribution event, the form submission, happens on the second page, and that page does not have the UTM parameters in its URL. Result: no attribution data, or attribution defaults to Direct or CRM UI.
The workaround is the same as the design rule: put the form on the landing page. If you must use a multi-page funnel, pass the UTM parameters through to the second page as query string parameters in the link. For example, if your landing page button links to /book, change the link to /book?utm_source={{url_parameter:utm_source}}&utm_medium={{url_parameter:utm_medium}}&utm_campaign={{url_parameter:utm_campaign}}. This uses HighLevel URL parameter merge fields to carry the UTM values forward. However, this is fragile and easy to break if you forget a parameter or mistype a merge field. The safer, simpler approach is to keep the form on the landing page.
When you build your ad campaigns in Google Ads or Facebook Ads Manager, use the official HighLevel UTM templates. Do not invent custom UTM schemes. Do not use spaces in UTM values. Do not mix uppercase and lowercase randomly. Copy the template exactly, and test it before you spend money. The industry-standard approach to UTM parameters is to use lowercase, underscores or hyphens instead of spaces, and consistent naming conventions across all campaigns. HighLevel expects specific patterns for Paid Search and Paid Social, so follow those patterns or your attribution will be classified incorrectly.
First vs Latest Attribution and Where to Inspect on the Contact
First Attribution and Latest Attribution serve different purposes. First Attribution tells you where the contact originally came from. This is useful for lifetime value analysis, cohort reporting, and understanding which channels bring in new leads. Latest Attribution tells you the most recent source. This is useful for multi-touch attribution, re-engagement campaigns, and understanding which channels drive repeat conversions.
Both are recorded on the contact record. To see them, open a contact in HighLevel and scroll to the Activity area at the bottom right. You will see First Attribution and Latest Attribution fields with the source, medium, campaign, and other UTM values. If the contact has never submitted a form or booked an appointment with UTM parameters, these fields may be empty or show CRM UI or Direct.
When you test a funnel, always inspect the attribution data on the test contact. Build a test URL with UTM parameters, open it in an incognito browser window, submit the form, and then check the contact record. If First Attribution shows the correct source, medium, and campaign, your tracking is working. If it shows Direct or CRM UI, you have a problem. Common causes: the form was submitted on a different page than the landing page, the UTM parameters had spaces or typos, the utm_source value did not match the HighLevel template, or the form submission did not fire the attribution event.
Do not assume attribution is working because the form created a contact. Attribution and contact creation are separate processes. A form can create a contact with no attribution data, and you will not know until you check the contact record. Operators who skip this step waste ad spend on campaigns they cannot measure.
Thank-You Pages and Page View Triggers
After a visitor submits a form on your landing page, you need to show them a thank-you page. This page confirms the submission, sets expectations for next steps, and optionally provides a secondary call to action. A good thank-you page says what happens next, when they will hear from you, and what they should do in the meantime. A bad thank-you page says "Thanks" and nothing else, leaving the visitor confused and likely to close the tab.
In HighLevel, you can redirect to a thank-you page after form submission by setting the form's redirect URL in the Form Builder. You can redirect to another funnel step, a website page, or an external URL. Most operators create a dedicated thank-you step in the funnel and redirect to that step. This keeps the entire conversion path inside the funnel and makes it easier to track page views and trigger workflows.
Page View triggers in HighLevel workflows let you start an automation when a visitor views a specific funnel or website page. You can filter by funnel or website, specific page or page path, and UTM parameters. This is useful for thank-you page workflows. For example, you can trigger a workflow when a contact views the thank-you page, wait five minutes, and send a confirmation email with next steps. Or you can trigger a workflow when a contact views a checkout page but does not complete the order, and send an abandon cart follow-up.
However, Page View triggers have a critical limitation: they fire every time the page is viewed, even if the same contact views it multiple times. If you use a Page View trigger on a thank-you page and the contact refreshes the page or clicks back and forward, the workflow may fire again. This can cause duplicate emails, duplicate opportunities, or duplicate tags. To avoid this, use filters in the workflow to check if the contact already has a tag or opportunity before you create a new one, or use a Form Submitted trigger instead of a Page View trigger.
In most cases, a Form Submitted trigger is safer and more reliable than a Page View trigger for lead capture workflows. When a contact submits a form, the Form Submitted trigger fires once per submission. You can filter by form, funnel, or page if needed. You can add tags, create opportunities, send notifications, and assign users without worrying about duplicate triggers. Reserve Page View triggers for scenarios where you need to track page views without a form submission, such as checkout abandons, webinar registration confirmation pages, or content download pages where the file is delivered on the thank-you page.
If you do use a Page View trigger on a thank-you page, make sure the workflow includes logic to prevent duplicates. Add a filter that checks if the contact already has a specific tag, or use a workflow goal to stop the workflow if the contact completes a certain action. Do not assume the workflow will only fire once just because the thank-you page is the last step in the funnel.
Wiring Submissions to Workflows: Tags, Notifications, Opportunities, and Assignment
When a contact submits a form on your funnel landing page, you need a workflow to process the lead. At a minimum, the workflow should add a tag to identify the funnel and campaign, create or update an opportunity in a pipeline, and notify the assigned user or team. Without a workflow, the contact sits in your database with no follow-up, no pipeline stage, and no owner. You paid for the lead, but you did nothing with it.
Start by creating a workflow in HighLevel with a Form Submitted trigger. Select the form you added to your funnel landing page. If you have multiple funnels using the same form, you can filter by funnel or page path to make sure the workflow only fires for submissions from the specific funnel. Once the trigger is configured, add actions.
The first action should be to add a tag. Use a naming convention that includes the funnel name and campaign. For example, if you are running a Google Ads campaign for a free consultation funnel, add a tag like "Funnel: Free Consult - Google Ads". This tag lets you segment contacts by funnel and source in reports, email campaigns, and other workflows. Tags are also useful for preventing duplicate workflows. If you have multiple workflows that could fire on the same form submission, you can add a filter to check if the contact already has the tag before you run the rest of the workflow.
The second action should be to create or update an opportunity in a pipeline. Select the pipeline and stage that match the funnel. For example, if the funnel is a lead magnet download, create an opportunity in the "New Lead" stage. If the funnel is a booking funnel and the contact has already booked, create an opportunity in the "Appointment Scheduled" stage. If an opportunity already exists for the contact in the same pipeline, you can update the stage instead of creating a duplicate. This keeps your pipeline clean and gives your sales team a single source of truth for each lead.
The third action should be to notify the assigned user or team. You can send an internal email or SMS to the user who owns the contact, or to a shared inbox or phone number. Include the contact name, email, phone, and any custom field values that help the user qualify the lead. For example, if your form asks "What is your biggest challenge?", include that answer in the notification so the user can personalize their follow-up. Do not send a generic "New lead submitted" message with no context. The faster your team can qualify and respond, the higher your conversion rate.
Optional actions include assigning the contact to a user, adding the contact to an email or SMS campaign, sending an immediate confirmation email or SMS to the contact, or starting a delay and follow-up sequence. The specific actions depend on your sales process and follow-up cadence. The key is to have a workflow that runs automatically every time the form is submitted, so no lead falls through the cracks.
Test the workflow by submitting a test lead through the funnel. Check that the tag is added, the opportunity is created in the correct pipeline and stage, the notification is sent, and any other actions fire as expected. If the workflow does not run, check the trigger filters, make sure the form ID matches, and check the workflow status to confirm it is published and active.
Connecting Funnel Leads to Pipelines and Calendars
Most funnels do not end with a form submission. The next step is to move the lead through a pipeline or book an appointment. HighLevel lets you connect funnel leads to pipelines and calendars using workflows and funnel steps.
For pipeline connection, use the Create Opportunity or Update Opportunity action in your Form Submitted workflow. Select the pipeline and stage that match the funnel goal. For example, if your funnel is a lead magnet download, create an opportunity in the "New Lead" stage. If your funnel is a demo request, create an opportunity in the "Demo Requested" stage. If the contact books an appointment in a later funnel step, update the opportunity to "Appointment Scheduled". This gives your sales team visibility into where each lead is in the conversion process and lets you track conversion rates by stage.
You can also use pipeline stages to trigger additional workflows. For example, when an opportunity moves to "Appointment Scheduled", send a confirmation email with the appointment details and a calendar link. When an opportunity moves to "Closed Won", send a welcome email and start an onboarding sequence. Pipelines and workflows together create a closed-loop system where every lead is tracked, followed up, and moved through the sales process automatically.
For calendar connection, add a booking step to your funnel. After the contact submits the lead form on the landing page, redirect them to a booking page with an embedded HighLevel calendar. The contact selects a time, fills in any additional booking form fields, and confirms the appointment. HighLevel records the booking as a separate attribution event, so if the booking page URL has UTM parameters, those parameters are recorded as Latest Attribution. The booking also triggers any workflows you have built on the Appointment Booked trigger, such as sending a confirmation email, adding a tag, or updating the opportunity stage.
Alternatively, you can embed a calendar directly on the thank-you page. After the contact submits the form, they see a thank-you message and a calendar widget on the same page. This reduces friction and increases booking rates because the contact does not have to click through to another page. However, this approach only works if the thank-you page is a funnel step with a unique URL. If you redirect to an external thank-you page or a shared website page, you cannot embed a calendar widget without custom code.
Do not make pipelines or calendars the entire focus of your funnel strategy. The funnel is the lead capture mechanism. Pipelines and calendars are the follow-up and scheduling mechanisms. All three need to work together, but the funnel is the front door. If the funnel does not capture the lead with correct attribution and trigger the right workflows, the pipeline and calendar are useless.
URL Parameters for Page Personalization vs Attribution UTMs
HighLevel supports URL parameters for page personalization. You can pass a parameter in the URL and display it on the page using the Custom Value Picker and the URL Parameter option. For example, if your ad links to /landing?city=Denver, you can display "Denver" in a heading or paragraph on the landing page by inserting the city URL parameter. You can also set a default value if the parameter is missing or empty, and you can apply text transforms like uppercase, lowercase, title case, or sentence case. Hyphens and underscores in parameter values are normalized to spaces for display.
URL parameters for personalization are supported across funnels, websites, stores, and webinars. You can use them in headings, paragraphs, buttons, and other text elements. Parameter name matching is case-insensitive, so city, City, and CITY all match the same parameter. Values are sanitized before render to prevent injection attacks.
This is different from UTM parameters for attribution. UTM parameters like utm_source, utm_medium, and utm_campaign are used by HighLevel to classify the contact source and record First and Latest Attribution. URL parameters for personalization are used to customize the page content for the visitor. You can use both on the same page. For example, your ad URL might be /landing?utm_source=adwords&utm_medium=cpc&utm_campaign=free_consult&city=Denver. HighLevel records the UTM parameters as attribution data when the contact submits the form, and displays "Denver" in the page heading using the city parameter.
Do not confuse the two. URL parameters for personalization do not affect attribution. UTM parameters for attribution do not display on the page unless you explicitly insert them using the URL Parameter picker. If you want to show the campaign name on the page, you can insert utm_campaign as a URL parameter, but this is usually not necessary. Most operators use URL parameters for personalization to show location, offer name, or audience segment, and use UTM parameters for attribution to track source, medium, and campaign.
One common mistake is to pass custom parameters for internal tracking and assume HighLevel will use them for attribution. For example, if you add ?source=google_ad to your URL, HighLevel will not classify the contact as Paid Search unless you also include the correct UTM parameters like utm_source=adwords. Custom parameters are ignored by the attribution engine. Stick to the official UTM templates for attribution, and use custom parameters only for page personalization.
Domains, SSL, Default Page, and the Publish Checklist
Before you send paid traffic to your funnel, you need to connect a domain, verify DNS, link the domain to the funnel, and wait for SSL to issue. Without a custom domain, your funnel will use a HighLevel subdomain, which looks unprofessional and may hurt conversion rates. Without SSL, browsers will show a "Not Secure" warning, which will scare visitors away.
To connect a domain, go to Settings, then Domains. Add your domain or subdomain, and HighLevel will provide DNS records to add at your domain registrar. Add the A record or CNAME record as instructed, then click Verify in HighLevel. Once DNS propagates and HighLevel verifies the records, SSL will be issued automatically. This can take a few minutes to a few hours depending on your DNS provider.
After the domain is connected and SSL is active, link the domain to your funnel. In the funnel settings, select the domain from the dropdown. You can also set a default page so that a specific funnel step opens when someone visits the root domain without a path. For example, if your domain is example.com and your landing page step is /landing, you can set /landing as the default page so that example.com opens the landing page directly.
Once the domain is linked, publish the funnel. In the funnel editor, click Publish or Publish Changes. This makes the funnel live on your custom domain. Test the funnel by visiting the domain in an incognito browser window. Check that the page loads, the SSL certificate is active, the form is visible, and the form submission works. Submit a test lead with UTM parameters in the URL and check that the contact is created with correct attribution data.
Here is a pre-launch checklist for every funnel before you spend ad budget:
- Domain connected, DNS verified, SSL active.
- Domain linked to funnel, default page set if needed.
- Funnel published, all steps visible at correct URLs.
- Form added to landing page, fields mapped to contact fields, validation rules set.
- Form submission creates contact, attribution data recorded, workflow triggers fire.
- Thank-you page or redirect configured, next step clear.
- Workflows tested: tags added, opportunities created, notifications sent.
- Test lead submitted with UTM parameters, First Attribution and Latest Attribution checked on contact record.
- Ad Final URL matches landing page URL, UTM parameters match HighLevel templates.
Do not skip this checklist. Every item is critical. If you skip domain setup, your funnel will not load. If you skip form testing, you will not capture leads. If you skip attribution testing, you will not know where your leads came from. If you skip workflow testing, your leads will sit in the database with no follow-up. Operators who skip the checklist waste money on ads that drive traffic to broken funnels.
Common Attribution and Funnel Failure Modes
Even experienced operators hit attribution and funnel failures. Here are the most common failure modes and how to avoid them.
Form on a second page after the ad click. The visitor lands on your landing page with UTM parameters, clicks a button to go to a second page, and submits the form on the second page. Attribution from the UTM parameters is not recorded because the form submission happened on a different page. Fix: put the form on the landing page, or pass UTM parameters through to the second page as query string parameters in the link.
Custom UTMs that break HighLevel templates. You use utm_source=google or utm_source=Google_Ads instead of utm_source=adwords. HighLevel does not classify the source as Paid Search, and attribution defaults to Direct or Other. Fix: use the official HighLevel UTM templates for Google Ads and Facebook Ads. Do not invent custom values.
Spaces or case errors in UTM parameters. You use utm_campaign=Free Consult with a space, or utm_source=AdWords with mixed case. HighLevel may not parse the parameters correctly, or the source classification may fail. Fix: use lowercase, replace spaces with underscores or hyphens, and copy the template exactly.
No workflow on form submit. The form creates a contact, but no workflow fires. The contact sits in the database with no tag, no opportunity, no notification, and no follow-up. Fix: create a Form Submitted workflow with the correct form and funnel filters, and test it by submitting a test lead.
Thank-you page with no next step. The visitor submits the form, sees a thank-you page that says "Thanks", and has no idea what to do next. They close the tab and forget about you. Fix: write clear next-step copy on the thank-you page. Tell them what happens next, when they will hear from you, and what they should do in the meantime. Add a secondary call to action like "Book a call" or "Download the guide" if appropriate.
Domain not linked or SSL not active. You publish the funnel, send traffic, and visitors see a "Not Secure" warning or a HighLevel subdomain. Conversion rate tanks. Fix: connect the domain, verify DNS, wait for SSL, and test the funnel before you send traffic.
Testing without UTM parameters. You test the funnel by visiting the landing page directly, without UTM parameters in the URL. The form works, but you do not check attribution. You assume attribution will work in production. It does not. Fix: always test with a full URL including UTM parameters, and check First Attribution on the test contact.
Double automation from page view and form submit. You create a Page View workflow on the thank-you page and a Form Submitted workflow on the landing page form. Both workflows fire for the same lead, creating duplicate tags, duplicate opportunities, and duplicate notifications. Fix: use Form Submitted workflows for lead capture, and reserve Page View workflows for scenarios where no form submission occurs.
Order form funnels without order triggers. You build a funnel with a HighLevel order form for a paid product. The order form submits, the payment processes, but you do not have a workflow on the Order Submitted trigger. The customer never receives a confirmation email or access to the product. Fix: create an Order Submitted workflow with the correct funnel and product filters, and send confirmation and fulfillment emails automatically.
These failure modes are not edge cases. They happen every day to operators who build funnels without testing attribution, workflows, and the full conversion path. The fix is always the same: test every step, check every contact record, and follow the checklist before you spend money.
Operator Launch Checklist and Ongoing Maintenance
Before you launch a funnel to paid traffic, run through this checklist one more time. Print it, save it, or keep it in a doc. Use it for every funnel.
- Funnel steps mapped: landing page, booking page or thank-you page, any additional steps.
- Primary action clear on each step: submit form, book appointment, click next step.
- Form on the landing page, not on a second page after the ad click.
- Form fields mapped to contact fields, validation rules set, Quick Add fields used where appropriate.
- Domain connected, DNS verified, SSL active, domain linked to funnel.
- Funnel published, all steps live at correct URLs.
- Ad Final URL matches landing page URL exactly.
- UTM parameters in ad Final URL match HighLevel templates: utm_source=adwords or utm_source=fb_ad, utm_medium, utm_campaign, utm_content, utm_term as needed.
- Test lead submitted with UTM parameters, contact created, First Attribution and Latest Attribution checked.
- Form Submitted workflow created, trigger filters set, actions tested: add tag, create opportunity, send notification, assign user.
- Thank-you page or redirect configured, next-step copy clear, secondary call to action added if appropriate.
- Page View workflows used only where needed, filters added to prevent duplicates.
- Pipeline and stage selected in workflow, opportunity created or updated on form submit.
- Calendar embedded or linked if booking is part of the funnel.
- All workflows published and active.
After launch, maintenance is just as important. Re-test the funnel after any form changes, domain changes, or workflow changes. Review attribution on a sample of contacts every week during active campaigns. If you see a spike in Direct or CRM UI sources, you have an attribution problem. If you see contacts with no opportunities, you have a workflow problem. If you see a drop in conversion rate, you may have a page load issue, a form validation issue, or a domain issue.
Check your funnel analytics in HighLevel. Look at page views, form submissions, and conversion rates by step. If your landing page has high traffic but low form submissions, test the form placement, the copy, or the offer. If your thank-you page has high bounce rate, add a clearer call to action or embed a calendar. If your booking page has low conversion, simplify the calendar options or reduce the number of booking form fields.
Funnel optimization is an ongoing process. You will never build the perfect funnel on the first try. But if you follow the checklist, test attribution, wire workflows correctly, and monitor performance, you will capture leads without losing attribution, and you will know exactly which campaigns are profitable.
Closing: Clear Next Steps
Pretty landing pages do not pay the bills. Attribution-safe funnels that capture leads, trigger workflows, and connect to pipelines do. Build your funnels step by step. Put the form on the landing page. Use the official HighLevel UTM templates. Test attribution on every test contact. Wire Form Submitted workflows to add tags, create opportunities, and notify your team. Connect your domain and SSL before you spend a dollar on ads. Follow the checklist. Check attribution weekly. Fix failures fast.
When you build funnels this way, you know where every lead came from, which campaigns are profitable, and which steps need optimization. You stop wasting money on traffic that converts but never enters your pipeline. You stop losing leads because a workflow did not fire. You stop guessing which ad drove the sale. You run a system that tracks, follows up, and converts.
Start with one funnel. Map the steps. Add the form. Set up the workflows. Test with UTM parameters. Check the contact record. Launch when the checklist is green. Then do it again for the next campaign. That is how operators build profitable funnels in HighLevel.
by Darius Gaynor