GoHighLevel Workflow AI Builder: Prompt, Review, and Ship Automations You Can Trust
Workflow AI Builder drafts workflows in seconds. Shipping one you can trust takes prompt discipline, review, and manual testing.
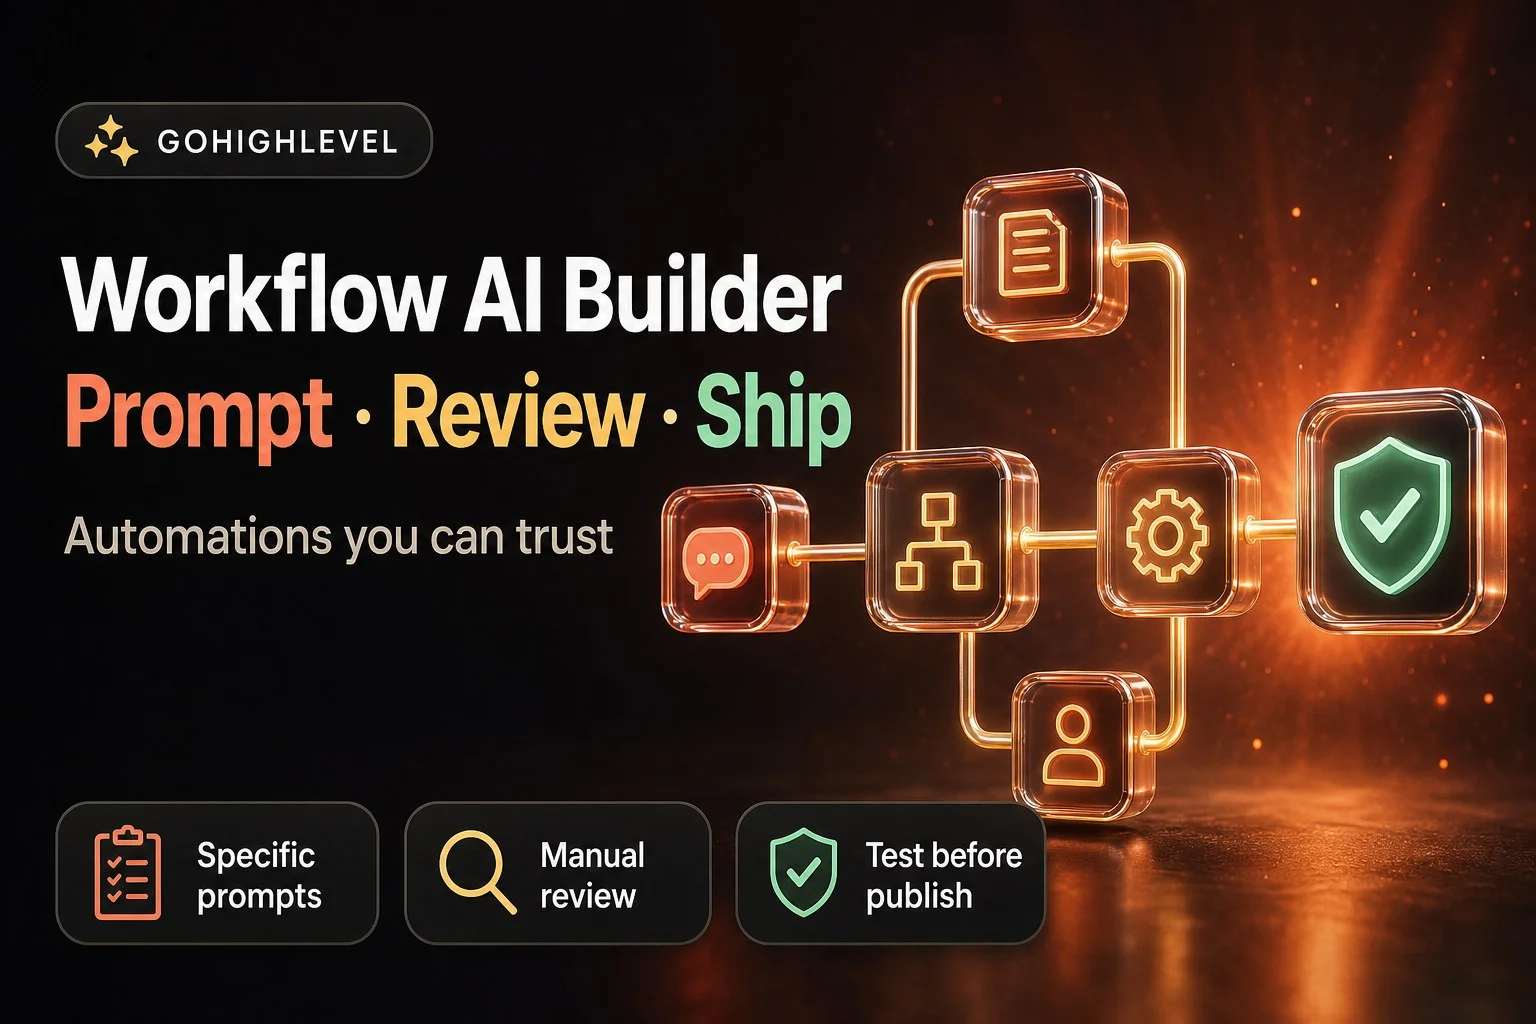
Workflow AI Builder can draft a five-step follow-up sequence in under thirty seconds. That speed is impressive. It is not the same as trust. Trust comes from knowing what you asked for, reviewing what the AI built, completing the post-generation checklist, and testing the workflow with a real contact before you publish. Speed gets you a first draft. Discipline gets you an automation you can ship.
This guide walks through the full operator playbook for GoHighLevel Workflow AI Builder. You will learn how to prompt with enough specificity that the AI delivers a usable structure, how to refine that structure with scoped conversational edits and Point and Edit, how to complete the To-Do List the builder surfaces, and how to test before publish because the AI cannot test workflows for you. You will also learn when to use AI Builder versus templates versus building from scratch, and how Workflow AI Builder fits alongside other automation tools in your HighLevel sub-account.
If you run a HighLevel sub-account and you want to move faster without shipping broken automations, this is the implementation discipline you need.
What Workflow AI Builder Is and What Version Three Changed
Workflow AI Builder converts plain-language prompts into end-to-end workflows. You describe the trigger, the timing, the channels, the conditions, and the content. The AI generates the trigger node, the action nodes, the structure, and the settings. You review, refine, complete any missing configuration, test with a contact, and publish.
Version three of the builder introduced streaming progress so you see each step appear in real time instead of waiting for the full draft. It added session memory so follow-up edits remember the context of earlier requests. It added undo and redo with keyboard shortcuts. It improved targeted bulk edits so you can say "copy the From Name across all email actions" or "update steps three, seven, and nine" and the AI applies changes only to the specified nodes. It also improved the Clarifying Agent, which now asks up to three questions when your prompt is too vague, and it made the builder white-label safe by avoiding platform-branded terms in generated content.
According to HighLevel's Workflow AI Builder guide, generation now averages under thirty seconds, down from roughly sixty seconds in earlier versions, with no stated trade-off in output quality. The builder autosaves AI-generated workflows on creation and on subsequent AI edits when autosave is enabled, so you do not lose work if you close the panel mid-session.
The builder is a speed tool. It is not a replacement for operator judgment. HighLevel's documentation states that manual review is required before publishing and that the AI cannot test workflows. Those two facts define the discipline required to ship automations you can trust.
Three Entry Points and How Labs Toggles Hide the Builder
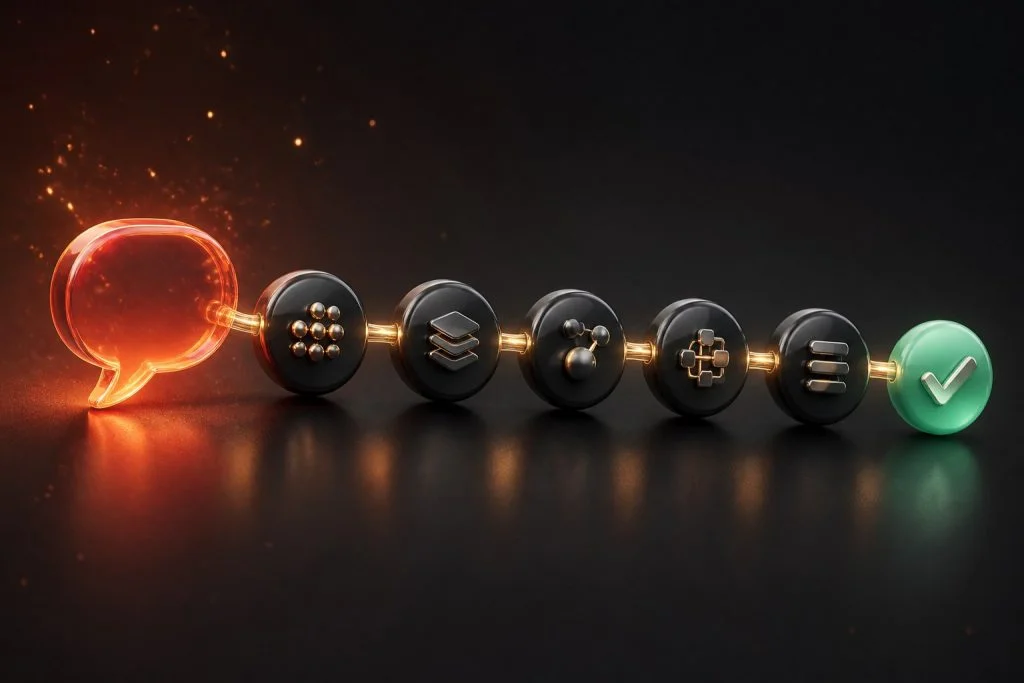
You can access Workflow AI Builder from three places inside your HighLevel sub-account. First, navigate to Automation then Workflows and click the "Build using AI" button. A modal opens with a prompt box. Second, create a new workflow from scratch and use the AI prompt box inside the Workflow Builder canvas. This prompt box supports voice dictation if you prefer to speak your request. Third, open the AI chatbot assistant inside the Workflow Builder and type or speak your prompt there.
When Workflow AI Builder is enabled, the landing experience after you click into Workflows offers three options: Build using AI, Browse Templates, or Create Workflow from scratch. If the builder is disabled in Labs, you see the previous landing experience without the AI option.
Two Labs toggles control visibility. At the agency level, go to Settings then Labs and find the Workflow AI Builder toggle. Disable it to hide the builder across all sub-accounts. At the sub-account level, go to Automations then Global Workflow Settings then Workflow AI and toggle off AI Builder to hide it for that sub-account only. If the "Build using AI" button disappears, check both toggles before troubleshooting further.
Prompt Like an Operator: Structure, Specificity, and the Clarifying Agent
A vague prompt produces a vague workflow. A specific prompt produces a usable first draft. The difference is structure. Your prompt should include the trigger, the timing, the channels, any conditions, and the content or action details. Action verbs help: Send, Notify, Create, Update, Wait, Check if. Optional details include the workflow name, settings like Allow Re-entry or Stop on Response, timezone and time window constraints, sender details such as From Name and From Email, and whether to mark conversations as read.
Here are example prompts adapted from HighLevel's documentation. "When a contact submits the lead form, send a welcome email immediately, wait two days, send a follow-up SMS, wait three more days, send a second email with a calendar link." "When a contact's birthday custom field matches today's date, send an SMS with a discount code at 9 AM in the contact's timezone." "When an opportunity value exceeds five thousand dollars, send a Slack notification to the sales channel with the contact name and deal value." "Twenty-four hours after a contact registers for the webinar, send an email with the replay link and a feedback survey."
You can also specify tools and apps. "When a high-priority tag is added, create a ClickUp task assigned to the account manager and send an internal email notification." You can link data across steps. "Use a GPT action to generate a personalized email subject line based on the contact's industry custom field, then insert that subject line into the email action in step two."
If your prompt is missing critical details, the Clarifying Agent will ask up to three questions. It might ask which trigger you want, which channel to use, what timing you prefer, or whether you want to apply filters. You can choose from suggested options or type a custom answer. You can also skip the question and let the AI decide, but answering improves first-pass accuracy. The Clarifying Agent is not a substitute for a well-structured prompt. It is a safety net for ambiguity.
Chat Mode lets you brainstorm and plan without building. Enable Chat Mode, describe your automation goals, ask questions, refine your approach. When you are ready to build, disable Chat Mode and give the AI the final prompt. This separation prevents the builder from generating a workflow prematurely while you are still thinking through the logic.
A Concrete Sample Prompt Walkthrough: Form Submit to SMS Follow-Up
Here is a step-by-step walkthrough of a real prompt, what the AI generates, and what you review after generation. This example shows the full cycle from prompt submission to first-pass review and helps you understand what to look for in your own workflows.
Your prompt: "When a contact submits the Contact Us form, send a welcome email immediately with the subject line 'Thanks for reaching out' and body text 'We received your message and will reply within 24 hours.' Wait 24 hours. If no reply, send an SMS saying 'Hi [First Name], just checking in. Do you have any questions?' Mark the conversation as read and allow re-entry."
You submit the prompt. The builder streams progress. First, you see the trigger node appear: Form Submitted, with the form name "Contact Us" selected. Next, an email action appears with the subject line and body text you specified. Then a Wait action appears, configured to wait 24 hours. Then an If/Else branch appears, checking for a reply. In the "no reply" branch, an SMS action appears with the message text and the First Name custom field inserted. Finally, the workflow settings update to show Allow Re-entry enabled and Conversations Mark as Read enabled.
Generation completes in under thirty seconds. Now you review. Open the trigger node. Confirm the form name is correct. Check if any filters are applied. In this case, no filters were specified in the prompt, so the trigger should fire for every submission of the Contact Us form. If you only want the workflow to fire for contacts in a specific pipeline stage or with a specific tag, you would need to add that filter manually or include it in your prompt.
Open the email action. Verify the subject line matches your prompt. Verify the body text matches. Check the From Name and From Email fields. If these are blank, the To-Do List will flag them, because the AI cannot infer which email account you want to use. You will need to select the account before the email can send.
Open the Wait action. Confirm it is set to wait 24 hours. Check the wait type. If you want the wait to respect business hours or a specific time window, verify those settings. If you want the wait to detect a reply and skip the SMS if the contact responds, confirm that reply detection is enabled and the correct channel is selected.
Open the If/Else branch. Confirm the condition checks for a reply. Open the SMS action in the "no reply" branch. Verify the message text. Confirm the First Name field is correctly inserted as a custom field placeholder. Check the From Number. If it is blank, the To-Do List will flag it.
Check the workflow settings. Confirm Allow Re-entry is enabled. Confirm Conversations Mark as Read is enabled. If you want the workflow to stop when the contact replies to the email, verify that Stop on Response is enabled and the correct action is selected as the stop point.
Now check the To-Do List. You see two items: "Select email account for Email action in step 2" and "Select SMS number for SMS action in step 5." Click the first item. It jumps you to the email action. You select your default email account from the dropdown. Click the second item. It jumps you to the SMS action. You select your SMS number. The To-Do List clears.
You have now completed first-pass review and To-Do List completion. The workflow is ready for testing. You create a test contact, submit the Contact Us form with that contact's email, and watch the workflow execute. The email sends immediately. You wait 24 hours or manually advance the wait timer in the workflow logs. The SMS sends because no reply was detected. You check the contact's conversation thread and confirm it is marked as read. You submit the form again with the same contact and confirm the workflow re-enrolls because Allow Re-entry is enabled.
This walkthrough shows the full cycle. Prompt with structure. Review the generated nodes. Complete the To-Do List. Test with a real contact. Confirm execution matches your intent. This is the discipline that turns a thirty-second draft into a workflow you can trust.
Generate, Autosave, and First-Pass Review
After you submit your prompt, the builder streams progress in real time. You see each trigger and action appear on the canvas as the AI constructs the workflow. Generation typically completes in under thirty seconds according to HighLevel's documentation. When autosave is enabled, the workflow is saved automatically on creation and after each subsequent AI edit.
Your first-pass review has four focus areas. First, check the trigger. Does it match what you asked for? Is the trigger type correct? Are any filters applied, and if so, are they the right filters? Second, check the action sequence. Are the steps in the correct order? Are the channels correct? Are Wait actions placed where you specified timing delays? Third, check the action settings. Open each email, SMS, and notification action. Review the content, the sender details, the subject lines, and any dynamic fields. Fourth, check the workflow settings. Look at Allow Re-entry, Allow Multiple Opportunities, Stop on Response, Timezone, Time Window, and Conversations Mark as Read. Verify that these settings align with your prompt and your automation goals.
Do not assume the first draft is correct. The AI interprets your prompt, but interpretation is not perfect. If the trigger is wrong, the workflow will not fire. If the timing is wrong, messages will arrive too early or too late. If sender details are missing, emails may fail to send. First-pass review catches these issues before you invest time refining content.
Refine with Scoped Conversational Edits and Point and Edit
After the first draft, you refine. Workflow AI Builder supports conversational edits with session memory, so follow-up requests remember the context of earlier changes. You can add, remove, replace, modify, or move actions and triggers. You can link data across steps, integrate additional apps, and build multi-path logic with If/Else branches. You can edit Wait actions by specifying wait type, reply detection, time windows, and timeout branches. You can apply bulk edits across matching actions, such as "update the From Name to Agency Support across all email actions" or "change the pipeline stage in steps four, six, and eight to Nurture."
Scoped edits are critical. If you say "change the email," the AI may change all emails or none. If you say "change the email in step three to include the contact's first name in the greeting," the AI knows exactly where to apply the change. Scope can be defined by step number, by action type, by channel, or by a specific phrase you reference from the canvas. The more precise your scope, the more predictable the result.
Undo and redo are available with keyboard shortcuts. Press Ctrl+Z on Windows or Cmd+Z on Mac to undo the last AI change. Press Ctrl+Y or Cmd+Y to redo. Session undo history is preserved, and you can also review Recent Changes from the panel. If an edit produces an unexpected result, undo it and rephrase your request with tighter scope.
Point and Edit Versus Scoped Chat-Edit: A Decision Framework with Example Prompts
You have two ways to refine an AI-generated workflow: scoped conversational edits and Point and Edit. Knowing when to use each method saves time and reduces errors. Here is the decision framework.
Use scoped conversational edits when you want to change multiple actions of the same type, when the change applies to a clear subset you can describe in words, or when you want to make a bulk update across the entire workflow. Scoped edits work well for changes like "update the From Name to Support Team across all email actions" or "change the pipeline stage to Qualified in steps two, five, and seven" or "add a calendar link to the footer of every email that mentions scheduling."
Use Point and Edit when the workflow has ten or more actions, when you have multiple actions of the same type and you want to change only one or two specific instances, or when verbal scope becomes ambiguous. Point and Edit works well in workflows with multiple branches, nested If/Else logic, or repeated action types where step numbers are hard to track. Instead of saying "change the second email in the left branch after the first If/Else," you activate selection mode, click the email action you want to change, and say "add a discount code to the body."
Here are three example edit prompts in the style documented by HighLevel. These examples show how to scope edits clearly and what level of detail the AI expects.
Example one: "In step four, change the Wait action to wait for a reply for up to 48 hours. If no reply is received, move to a timeout branch that sends an SMS saying 'We haven't heard back. Reply YES if you're still interested.' If a reply is received, skip the timeout branch and continue to step five." This prompt specifies the step number, the wait duration, the reply detection behavior, the timeout branch action, and the continuation path. The AI can apply this change without ambiguity.
Example two: "Copy the From Name and From Email from the email action in step two and apply them to all other email actions in this workflow." This is a targeted bulk edit. The AI identifies all email actions, reads the sender details from step two, and applies those details to the other email actions. This is faster than opening each email action manually and copying the fields yourself.
Example three: "Add an If/Else branch after step six. Check if the contact's Lead Score custom field is greater than 50. If true, send an email with the subject line 'You qualify for premium onboarding' and body text 'Our team will reach out within 24 hours.' If false, wait two days and then send an SMS saying 'Still interested? Let us know.'" This prompt adds complex logic with a condition, two branches, and different actions in each branch. The AI understands this structure in version three, but you should still open the resulting If/Else node and verify the condition, the branches, and the actions.
When you use scoped conversational edits, always define the scope explicitly. Use step numbers, action types, or phrases from the canvas. When you use Point and Edit, select the exact nodes you want to change before you describe the change. If an edit does not produce the result you expect, undo it with Ctrl+Z or Cmd+Z, review the scope or selection, and try again with tighter language.
Complex logic like If/Else branches and Wait actions can also be edited conversationally. You can say "add an If/Else after step five that checks if the contact's lead score is above fifty, and if true, send an email, if false, wait two days." You can say "change the Wait in step three to wait for a reply for up to forty-eight hours, and if no reply, move to the timeout branch." The AI understands these structures in version three, but you should still review the resulting nodes to confirm the conditions and branches match your intent.

Complete the Post-Generation To-Do List Before You Publish
After generation, Workflow AI Builder surfaces a To-Do List. This list contains items that require human input: credentials for integrations, account selection for email or SMS, pipeline and stage selection for opportunity actions, required custom fields, and step-specific settings the AI could not populate automatically. The To-Do List exists because some configuration decisions cannot be inferred from a prompt. They require context the AI does not have, such as which email account you want to use or which pipeline stage represents a qualified lead.
Do not skip the To-Do List. Each item links to the related action, so you can click the to-do and jump directly to the node that needs attention. Complete every item before you move to testing. An incomplete workflow will fail in predictable ways. An email action without sender credentials will not send. An opportunity action without a pipeline will not create the opportunity. A Wait action without a reply channel will not detect replies. These failures are silent until the workflow runs, and by then a contact is already enrolled and the sequence is broken.
The To-Do List is also a forcing function for review. As you complete each item, you are forced to open the action, read the settings, and confirm the configuration. This is a second layer of review on top of your first-pass check. It catches errors the first pass missed.
Test Before Publish Because AI Cannot Test Workflows
HighLevel's documentation states clearly that the AI cannot test workflows. Testing is your responsibility. You must create a test contact, enroll that contact in the workflow, and verify that every trigger, filter, action, and branch behaves as expected. This is not optional. This is the difference between a workflow that works in theory and a workflow that works in production.
Start with a fresh contact. Do not reuse a contact that has already been enrolled in other workflows or tagged in ways that might interfere with your test. Give the contact the attributes required to pass any filters in your trigger. If your workflow triggers on a form submission, submit the form with the test contact. If it triggers on a tag, apply the tag. If it triggers on a custom field value, set that value.
Watch the workflow execute. Open the contact record and check the activity timeline. Confirm that each email was sent, each SMS was delivered, each Wait action paused for the correct duration, and each If/Else branch took the correct path. If your workflow includes re-entry logic, test re-entry by triggering the workflow a second time with the same contact and confirming the behavior matches your Allow Re-entry setting. If your workflow includes Stop on Response, send a reply from the test contact and confirm the workflow stops.
Check the execution logs. Navigate to the workflow and open the logs panel. Look for errors, warnings, or skipped actions. Compare the test run to what you expected. If an action did not fire, check the filters and conditions. If a Wait action did not pause, check the Wait settings. If an email did not send, check the sender credentials and the To-Do List.
Testing also reveals timing issues. A workflow that looks correct on the canvas may have Wait actions in the wrong sequence or time windows that conflict with your timezone settings. Testing with a real contact and real execution logs surfaces these issues before your first live enrollment.
For a deeper primer on workflow fundamentals, filters, re-entry settings, and troubleshooting execution logs, see HighLevel's getting started with workflows guide. That guide covers the baseline workflow concepts that apply whether you build with AI, templates, or from scratch.
A Practical Test Matrix: Five Scenarios and What You Expect
Testing is not guessing. You design test scenarios that cover the most common execution paths and edge cases, then you verify the workflow behaves as expected in each scenario. Here is a practical test matrix with five scenarios. Use this matrix as a template for your own workflows.
Scenario one: Fresh contact, all filters pass, re-entry disabled. Create a new contact with no prior workflow history. Set the contact's attributes so they pass all filters in your trigger. For example, if your trigger fires on a tag and filters for contacts in the "Lead" pipeline stage, create a contact, add the tag, and set the pipeline stage to "Lead." Enroll the contact. Expected result: The workflow fires immediately. All actions execute in sequence. The contact completes the workflow. If you try to enroll the same contact again, the workflow does not fire because re-entry is disabled.
Scenario two: Wrong filter, workflow should not fire. Create a contact with attributes that do not pass the trigger filters. For example, if your trigger filters for contacts with a Lead Score above 50, create a contact with a Lead Score of 30. Apply the trigger event (form submission, tag, etc.). Expected result: The workflow does not fire. The contact does not appear in the workflow execution logs. This confirms your filters are working correctly.
Scenario three: Re-entry enabled, contact triggers workflow twice. Create a contact, enroll them in the workflow, and let the workflow complete. Then trigger the workflow again with the same contact. Expected result: The workflow fires a second time. The contact appears in the execution logs twice. All actions execute again. This confirms Allow Re-entry is working correctly. If you want the workflow to fire only once per contact, disable Allow Re-entry and retest.
Scenario four: Business-hours time window, workflow waits until window opens. Create a workflow with a time window set to business hours, for example 9 AM to 5 PM Monday through Friday. Trigger the workflow outside the time window, for example at 8 PM on a Saturday. Expected result: The workflow fires, but any actions constrained by the time window do not execute until the window opens. Check the execution logs. You should see the actions queued with a scheduled time matching the start of the next business-hours window. This confirms your time window settings are working correctly.
Scenario five: To-Do incomplete, action fails silently. Create a workflow with an email action. Do not complete the To-Do List item for selecting the email account. Enroll a test contact. Expected result: The workflow fires, but the email action fails. Check the execution logs. You should see an error message indicating that the email account is missing. This confirms that incomplete To-Do items cause silent failures. Complete the To-Do List, re-enroll the contact, and verify the email sends successfully.
This matrix covers the most common test scenarios. For your own workflows, add scenarios that match your specific logic. If your workflow has an If/Else branch, test both branches. If your workflow has a Wait action with reply detection, test with a reply and without a reply. If your workflow has Stop on Response, test with a response and confirm the workflow stops. Design your test matrix before you test, document the expected results, and compare the actual results to your expectations. If the results do not match, review the workflow settings, check the execution logs, and troubleshoot before you publish.
AI Builder Versus Templates Versus Building from Scratch
Workflow AI Builder is one tool in a set of three. Templates are another. Building from scratch is the third. Each has a place, and knowing when to use which tool saves time and reduces errors.
Use AI Builder when you have a clear goal, a specific trigger and sequence in mind, and you want a first draft fast. AI Builder works well for standard follow-up sequences, nurture campaigns, notification workflows, and event-triggered automations. It works well when the logic is linear or has one or two branches. It works less well when the logic is highly conditional, when you need precise control over node placement, or when you are building a workflow with more than fifteen actions and multiple nested branches. At that complexity, the AI may produce a structure that is close but requires extensive manual rework, and you may spend more time editing than you would have spent building from scratch.
Use templates when you are implementing a known pattern. HighLevel provides workflow templates for common use cases: appointment reminders, review requests, abandoned cart follow-ups, webinar sequences. Templates give you a pre-built structure with placeholders for your content and settings. You customize the placeholders, complete the To-Do List, test, and publish. Templates are faster than AI Builder when the template matches your use case exactly, because you skip the prompt and generation steps and go straight to customization.
Build from scratch when you need precise control from the first node, when the workflow logic is complex and you want to see every condition and branch as you build it, or when you have tried AI Builder or templates and neither produced a structure close enough to your goal. Building from scratch is slower, but it is also more predictable. You place every node, set every condition, and link every data field yourself. There is no interpretation layer. What you build is what you get.
There is also a decision point during refinement. If you have asked the AI to make three or four edits and the workflow is still not right, stop iterating and rebuild. Iteration has diminishing returns. Each conversational edit adds complexity to the session memory, and at some point the AI loses track of the original intent. If you find yourself rephrasing the same request multiple times, it is faster to start a new workflow from scratch or from a template and build it manually with the lessons learned from the AI draft.
Documenting Prompt Templates for an Agency Team
If you run an agency or manage a team of operators, prompt templates are a force multiplier. A prompt template is a reusable pattern that captures the structure, scope, and detail level required to generate a specific type of workflow. Instead of writing prompts from scratch every time, your team uses the template, fills in the variables, and submits. This standardizes output quality, reduces training time, and ensures that every operator prompts with the same level of specificity.
Here is how to build a prompt template library. Start by identifying the five to ten most common workflows your team builds. For each workflow type, write a detailed prompt that includes the trigger, timing, channels, conditions, content, and settings. Test the prompt. Generate the workflow, review it, complete the To-Do List, test it, and confirm it produces a usable first draft. Once you have a working prompt, turn it into a template by replacing the specific details with placeholders.
For example, here is a prompt template for a post-form-submission follow-up sequence: "When a contact submits the [FORM_NAME] form, send a welcome email immediately with the subject line '[SUBJECT_LINE]' and body text '[BODY_TEXT]'. Wait [WAIT_DURATION]. If no reply, send an SMS saying '[SMS_TEXT]'. Mark the conversation as read and allow re-entry." Your team fills in the placeholders: FORM_NAME, SUBJECT_LINE, BODY_TEXT, WAIT_DURATION, SMS_TEXT. They submit the prompt. The AI generates the workflow. They review, complete the To-Do List, test, and publish.
Store your prompt templates in a shared document or knowledge base. Include the template text, the placeholders, example values for each placeholder, and a checklist of what to review after generation. For each template, note any To-Do List items that typically appear and any settings that require manual adjustment. This documentation reduces onboarding time for new operators and ensures consistency across your team.
One important note from HighLevel's documentation: Workflow AI Builder is white-label safe. It avoids platform-branded terms in generated content. If you are building workflows for white-label clients, review the generated content to confirm it does not include HighLevel branding, and update your prompt templates to specify client-safe language. For example, instead of saying "HighLevel will send you a reminder," say "You will receive a reminder" or "Our team will send you a reminder."
Prompt templates also support scalability. As your team grows, new operators can use the templates to build workflows without needing deep expertise in prompt engineering. They follow the template, fill in the placeholders, and the AI generates a workflow that matches your agency's quality standards. This is how you move faster without sacrificing consistency.
How Workflow AI Builder Fits with Managed Agents and Classic Follow-Up Systems
Workflow AI Builder is part of a broader automation toolkit in HighLevel. It sits alongside classic workflows, templates, and Managed Agents. Understanding the boundaries between these tools prevents confusion and helps you choose the right tool for each task.
Workflows built with AI Builder are deterministic sequences. The workflow fires on a trigger, executes a series of actions in a defined order, and stops. The sequence may include Wait actions, If/Else branches, and conditional logic, but the structure is fixed. Once you publish the workflow, it runs the same way every time the trigger fires and the filters pass. This is the right tool for follow-up sequences, nurture campaigns, notification routing, and any automation where the steps are predictable and the logic can be mapped in advance.
Managed Agents, by contrast, own conversational multi-step tasks. An agent can read a conversation thread, decide what action to take, execute that action, read the response, and decide the next action. Agents handle tasks that require judgment, context, and adaptation. They are not sequences. They are task owners. For a full breakdown of how to build and deploy Managed Agents in HighLevel, see our guide on GoHighLevel Managed Agents.
The two tools are complementary. A workflow can enroll a contact in a nurture sequence, and a Managed Agent can handle the replies. A workflow can route a high-value lead to a sales pipeline, and a Managed Agent can qualify that lead through a conversation. A workflow can send appointment reminders, and a Managed Agent can reschedule when the contact replies asking for a different time. The workflow handles the deterministic sequence. The agent handles the conversational task. Do not conflate them.
Classic workflows built from scratch or from templates remain the baseline. AI Builder accelerates the drafting process, but it does not replace the need to understand triggers, filters, actions, re-entry logic, and execution logs. If you do not understand how workflows work, AI Builder will generate structures you cannot troubleshoot. Learn the fundamentals first. Use AI Builder to move faster once you know what you are building.
Common Mistakes and a Ship Checklist
Operators make predictable mistakes with Workflow AI Builder. Here are the most common and how to avoid them.
First, vague prompts. If you say "send a follow-up email," the AI has to guess the trigger, the timing, the content, and the sender. The result is a workflow that may or may not match your intent. Be specific. Include the trigger, the timing, the channel, and the content details in every prompt.
Second, skipping the To-Do List. The builder surfaces the list for a reason. Every incomplete item is a potential failure point. Complete the list before you test. Do not assume the workflow will work without credentials, accounts, or pipeline settings.
Third, publishing without testing. The AI cannot test workflows. You must test with a real contact, check the execution logs, and verify that every action fired correctly. Publishing without testing is publishing blind.
Fourth, editing without defining scope. If you say "change the email" in a workflow with five email actions, the AI may change all five, or it may change none. Define scope by step number, action type, or visual selection with Point and Edit.
Fifth, using AI Builder for every edge case. If a workflow has twenty actions, six nested branches, and complex conditional logic, AI Builder may not be the right tool. Templates or building from scratch may be faster and more accurate. Know when to stop iterating and rebuild manually.
Sixth, conflating Workflow AI Builder with Managed Agents. AI Builder drafts deterministic sequences. Managed Agents own conversational tasks. They are different tools with different use cases. Do not expect a workflow to handle a conversation, and do not expect an agent to execute a fixed sequence.
Here is a ship checklist you can use before you publish any AI-generated workflow. First, review the draft structure. Check the trigger, the action sequence, and the settings. Second, complete the To-Do List. Verify credentials, accounts, pipelines, and required fields. Third, verify workflow settings. Check Allow Re-entry, Allow Multiple Opportunities, Stop on Response, Timezone, Time Window, and Conversations Mark as Read. Fourth, test with a fresh contact. Enroll the contact, watch the workflow execute, and check the execution logs. Fifth, compare the test run to your original prompt. Did the workflow do what you asked? Sixth, publish. Seventh, monitor the first live enrollments. Check the logs for the first three to five contacts who enroll after publish. Confirm that the workflow behaves in production the same way it behaved in testing.
Where SumoGrowth Helps
SumoGrowth is an AI implementation and consulting agency. We build and review AI growth systems for businesses running HighLevel sub-accounts. Workflow AI Builder is a speed tool, but speed without discipline creates broken automations. We help operators build the discipline layer: prompt libraries for common use cases, review checklists that catch configuration errors before testing, test plans that verify triggers, filters, re-entry logic, and execution paths, and system design that wires AI-built workflows into a broader automation architecture alongside Managed Agents and classic follow-up systems.
If you are shipping workflows at scale and you need a second set of eyes on your prompts, your To-Do List completion process, or your test protocols, we can help. If you are building a multi-layer automation system and you need help deciding when to use AI Builder versus templates versus scratch builds versus Managed Agents, we can help. If you want to move faster without shipping broken sequences, we can help you build the implementation discipline that turns speed into trust.
Workflow AI Builder gives you a first draft in under thirty seconds. What you do with that draft determines whether you ship an automation you can trust. Prompt with structure. Review the draft. Complete the To-Do List. Refine with scoped edits. Test with a real contact. Publish. Monitor. That is the playbook. Follow it, and you will ship faster without breaking things.
by Darius Gaynor